Showing posts with label widgets. Show all posts

Professional Footer Quote Author Box Widget For Blogger

19 Comments
Professional Footer Author Box Widget For Blogger
Having an author box and about us page is very much important, because All bloggers and visitors love to know about the person behind the blog .Keeping Author Box in blog footer makes your blog professional and Outstanding .You might have come across such widgets in WordPress blogs and Other websites , but unfortunately there is non for blogger.So,Today I have made this widget for blogger users!!To Get this Widget,we just need to add some code in our Widget box.This widget also helps to get Authorship in Google Search Results.We Highly recommend to place this widget in footer


After working out this post you will end up something like this :


Durai Sankar
Man
Behind
This Blog

I'm the owner and founder of this blog. I reside in Chennai, India and I'm doing my 11th grade...

How to add this Widget to Blogger:

  • Go to Blogger > Layout > Add A Gadget > HTML/JAVASCTIPT
  • Paste the following coding inside it:
<style>.quote_box{width:225px;margin-top:12px;background:#fff url(https://blogger.googleusercontent.com/img/b/R29vZ2xl/AVvXsEhbej4WTR9Mk52lwBVEhmI4OJ2z_-83rhXGGh0igf9YlNhM4zFumtgPXO2Q0-gymx74vcXwgI71un9zmNitGL2GAx5VcKmOc7leIJgEiBcL91ki8o3ngE1x-S_M6RDPM9Be0T4y-jGZ3GpI/s320/footer+author+quote.PNG) no-repeat 94% 7%;border:1px solid #b6b6b6;position:relative;padding:18px}.quote_box:before{border:15px solid;bottom:-30px;content:'';height:0;right:40px;position:absolute;width:0;border-color:#b6b6b6 transparent transparent #b6b6b6}.quote_box:after{border:14px solid;bottom:-27px;content:'';height:0;position:absolute;right:41px;width:0;border-color:#fff transparent transparent #fff}.quote_content{overflow:hidden}.detail_box{float:left;margin-left:0}.detail_box span{display:block}.detail_box span.name{font-size:17px;line-height:30px}.detail_box span.derole{ color: #666666; font-size: 15px; font-style: italic; line-height: 10px;}.said_box{ font-size: 20px;float:left;margin-top:-130px;margin-left:72px}.said_box span.roleau{ color: #333333; font-size: 16px; font-style: normal; line-height: 20 px;}.custom li.quotes,.custom li.widget.quotes p{margin-bottom:0} </style> <br /> <div class="quote_box"> <div class="quote_content"> <div class="detail_box"> <img alt="Durai Sankar" src="YOUR 125 X 125 IMAGE URL" style="border-radius: 777px 777px 777px 777px;" title="Durai Sankar" /><span class="derole"></span><br /> <span class="derole">Man</span><br /> <span class="derole">Behind</span><br /> <span class="derole">This Blog</span></div>
<div style="text-align: right;"><div class="said_box"> <a href="YOUR GOOGLE + URL" rel="author" target="_blank">Durai Sankar</a><span class="roleau"></span><br /> <span class="roleau">I'm the owner and founder of this blog. I reside in Chennai, India and I'm doing my 11th grade...<a href="YOUR ABOUT US PAGE URL" rel="author" target="_blank">More</a></span></div> </div> </div> </div></div>

Customisation:

  • Just Replace Durai Sankar with your name.
  • And Replace Other Bold Texts with mentioned above.
  • Replace Blue Text with your Description.Thats all!
I hope you liked this widget very much.Please take few seconds to share with your friends.
Read More

Cool Follow Us Twitter Bird Widget For Blogger

19 Comments
This post is written by our guest author.Check how to become a guest author in True Blogger Tricks
cool twitter follow us widgetHi guys. Exposure to social media is a very crucial task to gain reputation. Well, people often don't share others blog on their account because they see not benefit in that. In this post, we would show you a very nice twitter widget bird which is attractive. It is made from Flash javascript. I was just surfing on internet and found this widget on a site so I immediately took out the code from source. Hope you would like it..
Read More

Make your blog faster with lazy Image loading script

38 Comments
when blog loads slow
Don’t you hate it when websites load slowly? I know I do. And to make matters worse, do you even come back to websites that load slow? The chances are, you don’t!.There are many factors But Images are one of the important factor that affects blog load time.So,To reduce blog Images load time today I have brought lazy image loading plugin for blogger!

Lazy Load is a jQuery plugin which only loads Images seeable in the viewport (visible part of web page) thereby enhancing the Page Load time. The images which are out the initial visible region of the screen are loaded as the users scrolls through them. A really useful plugin for Image intensive Blog's.This widget really decrease the 50% of blogs load time as you check your own blog with Gtmetrics.Lets see the working of this plugin

How to install this plugin to blogger?

  • Login to Blogger > Dashboard
  • Click on Drop Down Menu and select Template
  • Backup your Template before making any changes to your blog
  • Now Click on Edit HTML > Proceed
  • Press Ctrl + F and search the code shown below. 
</head>
Copy below codes and paste above </head>

<script type='text/javascript'>//<![CDATA[
(function(a){a.fn.lazyload=function(b){var c={threshold:0,failurelimit:0,event:"scroll",effect:"show",container:window};if(b){a.extend(c,b)}var d=this;if("scroll"==c.event){a(c.container).bind("scroll",function(b){var e=0;d.each(function(){if(a.abovethetop(this,c)||a.leftofbegin(this,c)){}else if(!a.belowthefold(this,c)&&!a.rightoffold(this,c)){a(this).trigger("appear")}else{if(e++>c.failurelimit){return false}}});var f=a.grep(d,function(a){return!a.loaded});d=a(f)})}this.each(function(){var b=this;if(undefined==a(b).attr("original")){a(b).attr("original",a(b).attr("src"))}if("scroll"!=c.event||undefined==a(b).attr("src")||c.placeholder==a(b).attr("src")||a.abovethetop(b,c)||a.leftofbegin(b,c)||a.belowthefold(b,c)||a.rightoffold(b,c)){if(c.placeholder){a(b).attr("src",c.placeholder)}else{a(b).removeAttr("src")}b.loaded=false}else{b.loaded=true}a(b).one("appear",function(){if(!this.loaded){a("<img />").bind("load",function(){a(b).hide().attr("src",a(b).attr("original"))[c.effect](c.effectspeed);b.loaded=true}).attr("src",a(b).attr("original"))}});if("scroll"!=c.event){a(b).bind(c.event,function(c){if(!b.loaded){a(b).trigger("appear")}})}});a(c.container).trigger(c.event);return this};a.belowthefold=function(b,c){if(c.container===undefined||c.container===window){var d=a(window).height()+a(window).scrollTop()}else{var d=a(c.container).offset().top+a(c.container).height()}return d<=a(b).offset().top-c.threshold};a.rightoffold=function(b,c){if(c.container===undefined||c.container===window){var d=a(window).width()+a(window).scrollLeft()}else{var d=a(c.container).offset().left+a(c.container).width()}return d<=a(b).offset().left-c.threshold};a.abovethetop=function(b,c){if(c.container===undefined||c.container===window){var d=a(window).scrollTop()}else{var d=a(c.container).offset().top}return d>=a(b).offset().top+c.threshold+a(b).height()};a.leftofbegin=function(b,c){if(c.container===undefined||c.container===window){var d=a(window).scrollLeft()}else{var d=a(c.container).offset().left}return d>=a(b).offset().left+c.threshold+a(b).width()};a.extend(a.expr[":"],{"below-the-fold":"$.belowthefold(a, {threshold : 0, container: window})","above-the-fold":"!$.belowthefold(a, {threshold : 0, container: window})","right-of-fold":"$.rightoffold(a, {threshold : 0, container: window})","left-of-fold":"!$.rightoffold(a, {threshold : 0, container: window})"})})(jQuery);$(function(){$("img").lazyload({placeholder:"https://blogger.googleusercontent.com/img/b/R29vZ2xl/AVvXsEib783M6_WT3G8VgJZPdAAYSsAVq7zC13iCYKZl8Mn1JyGApb3CY8-2D_k3k-cMZFoBULrFxfIMZjotA57B_wP_Hzr5tbMWW-tY_si7_t1CxSDkUJDqnj_3A3u4yHRiYz9dVqHofScKQ30/s1600/truebloggertricks.blogspot.com.gif",effect:"fadeIn",threshold:"-50"})})//]]></script>

  • Now just press on save template and refresh your blog.  
  • Now just scroll your blog and see your images fade in with lazy loading effect.
If you have any Doubts regarding this post, Please ask it via comments and Dont forget to share this post with your friends!!
Read More

Top 10 Blogger Resource websites of 2013

21 Comments
Top ten blogger resources Sites
All Bloggers build thier blogs and websites in hope of attaining good Traffic,Page rank and making money But, Many blogger lose their confidence and hope in half way and finally quit blogging.So, All Bloggers who start blogging are not succeeded at the End.Only few people who work very hard and made lot of efforts for there blogs are finally succeeded and attain great positions in blogosphere.So,Today I have picked Top Ten blogger resources sites which are  full of quality stuff that will help you with various aspects Blogger platform.These sites are ranked according to their alexa rank and quality of their posts and Contents .Lets see them from last


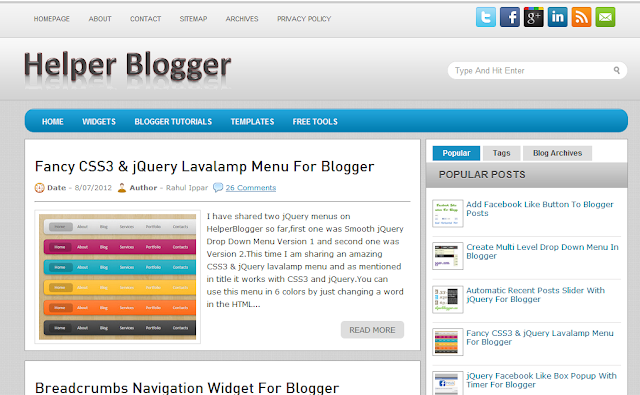
10. Helper Blogger

helper for blogger


Helper Blogger is Administrated by Rahul Ippar of India.This blog is mainly focused on blogger widgets and Tricks.This blog is just 1 years old But his widgets and Tutorials are really great

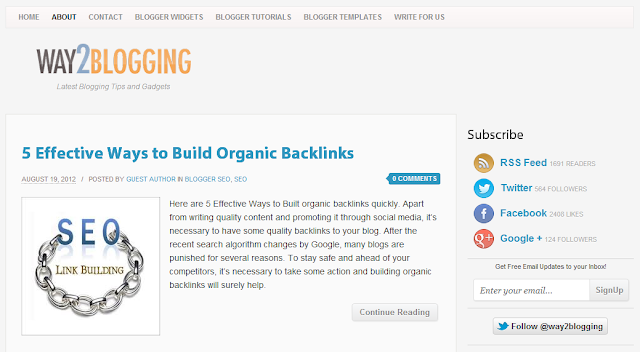
9. Way2Blogging

way 2 blogging

This Blog is Administrated by Harish of India.This blog is famous for his blogger widgets and high quality templates


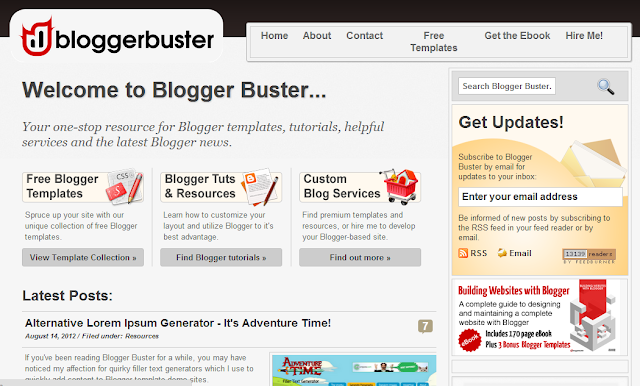
8. Blogger Buster

blogger buster


This blog is administrated by Amanda Kennedy of United Kindom.This a pretty old blog but it is updated in regular basis

7. Blogger Plugins

blogger widgets

One of the Oldest blog dedicated to Blogger known for its Blogger API widgets and In-depth Tutorials.


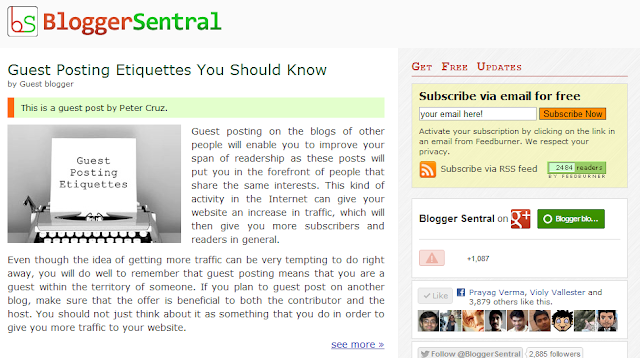
6. Blogger Sentral


blogger sentral

Bloggersentral ranks 6th place in this list.This blog is administrated by Green Lava.This blog is known for its simplicity.

5. My Blogger Lab

my blogger lab


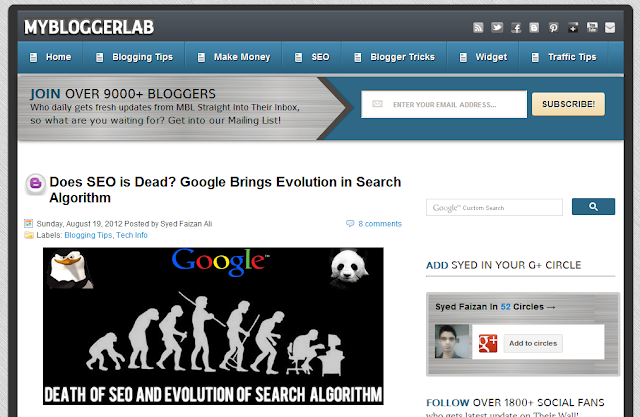
We camed to top 5 of this list. Our 5th place goes to great Mybloggerlab !!.This Blog is administrated by young Blogger Syed Faizan and His blog covers all the basic needs of Blogger

4. All Blogging Tips


All Blogging tips ranks 4th in our list .This blog is administrated by talented blogger, Ammar Ali.This blog is well Known For his SEO tutorials

3.Spice up your Blog

spice up your blog

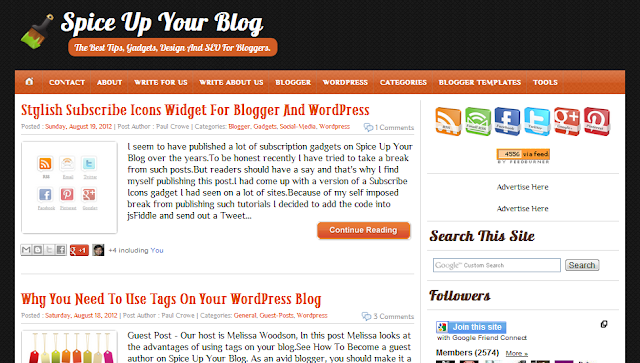
Spice Up Your Blog has one of the biggest collection of Blogger Tutorials,Tips and Widgets. Established in mid-2009.This blog is administrated by Paul Crowe.Guest post play a major domination in this blog.


2. All Blog Tools


All Blog Tools ranks 2nd in this list.This website full blogger resources like templates,Widgets , Tutorials and Tips & Tricks


1. My Blogger Tricks

my blogger tricks

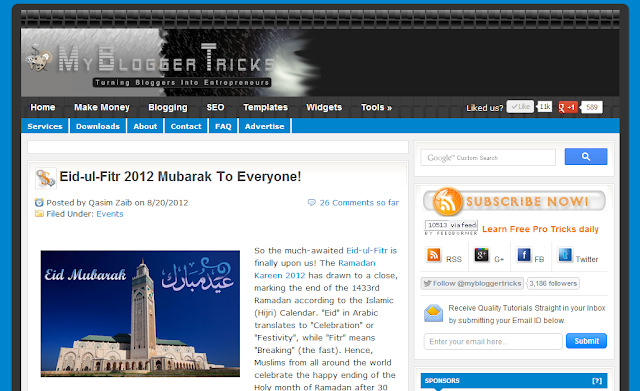
Finally we camed to the Last part of this post.Everyone will be waiting for this.The First place goes to Great My Blogger Tricks!! This is a only blog in blogger platform to reach the alexa rank of below 5,500 !!.This Blog is administrated by entrepreneur Mohammad Mustafa Ahmedzai and his crew members and Their posts are Brillliant and Extra Ordinary.

What makes above Sites unique from Others?

  • Quality Contents
  • New Ideas
  • Frequent Updates
  • Friendly communication between readers
  • And Finally Hard work and Effort!!
I hope you liked this post very much So,Please take 5 seconds to share this post with your friends.If I missed any great websites,Please mention it in comments so that I may extend my Ranks to 'Top 15' or 'Top 20'.

But Dont Forget To Follow This Blog Also!!!!! :)

Read More

Wordpress like Email Subscription widget for blogger

21 Comments
Wordpress like Email Subscription widget
Hello Friends!Today I will tell you how to add a email subscription widget like in wordpress blogs.Email subscription is a very popular way to subscribe any blog/website and get updates directly in the mailbox,that's why you may always notice that number of feeds subscribers is always more that any other social social network subscribers.This widget is fully adapted from wordpress.This an awesome email subscription widget which can be used to increase your feedburner subscribers and also makes your blog look professional and smart looking.As always I have tried my best to make this tutorial with a one step installation.You just have copy and paste the code.Now lets see the live working of this widget.


Demo

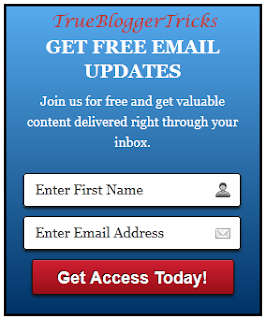
GET FREE EMAIL UPDATES

Join us for free and get valuable content delivered right through your inbox.


How to add this Widget to Blogger 

To add this widget,Just Follow below simple steps:
  • Go to your Blogger Dashboard
  • Then Go To Layouts----> Add A Widget-----> Html Javascript
  • Just paste these Codes in your respective gadget box.

<center>
<div align="center" id="truebloggertricks-Subscribe-wrapper">
<div id="ig-subscription-optin" style="border: 3px solid #000000; filter: progid:DXImageTransform.Microsoft.gradient( startColorstr='#55AAEE', endColorstr='#003366',GradientType=0 ); width: 240px;">
<h3 id="truebloggertricks-title-text" style="color: white; font-size: 20px;">
GET FREE EMAIL UPDATES</h3>
<div id="truebloggertricks-sub-title-txt" style="color: white; font-size: 14px;">
Join us for free and get valuable content delivered right through your inbox.</div>
<br />
<form action="http://feedburner.google.com/fb/a/mailverify" method="post" onsubmit="window.open('http://feedburner.google.com/fb/a/mailverify?uri=truebloggertricks', 'popupwindow', 'scrollbars=yes,width=550,height=520');return true" target="popupwindow">
<input class="name" id="truebloggertricks_Subscriber_name" name="name" onblur="if(this.value=='')this.value=this.defaultValue;" onfocus="if(this.value==this.defaultValue)this.value='';" type="text" value="Enter First Name" /><br />
<input class="email" id="truebloggertricks_Subscriber_email" name="from" onblur="if(this.value=='')this.value=this.defaultValue;" onfocus="if(this.value==this.defaultValue)this.value='';" style="width: 130px;" type="text" value="Enter Email Address" /><br />
<div class="separator" style="clear: both; text-align: center;">
</div>
<input name="uri" type="hidden" value="truebloggertricks" /><input name="loc" type="hidden" value="en_US" /> <input id="truebloggertricks_Submit_Text" style="height: auto; padding: 5px 0;" type="submit" value="Get Access Today!" /></form>
</div>
</div>
</center>
<style>#ig-subscription-optin {margin: 0px;padding: 10px;background: #2A6DA9;
background: -moz-linear-gradient(top, #5AE, #036);background: -webkit-gradient(linear, left top, left bottom, from(#5AE), to(#036));height: auto!important;color: white !important;padding: 20px 15px !important;
text-align: center !important;font-family: Georgia, Times, "Times New Roman", serif !important;margin: 10px;margin: 0px;padding: 10px;
margin: 8px 0 0 !important;line-height: 22px;font-family: Georgia, Times, "Times New Roman", serif;padding: 5px;border: none;}#ig-subscription-optin p {margin: 8px 0 0 !important;line-height: 22px;font-family: Georgia, Times, "Times New Roman", serif;
padding: 5px;border: none;}#ig-subscription-optin input.name {
background: white url(https://blogger.googleusercontent.com/img/b/R29vZ2xl/AVvXsEg086gOrs0i4jqxtJbzBwdoLrIUFUz7ANofk-A-gIBWpfqXYCMIVjXdE9yVbmdWb0aiCbrrHRP-Tp7cFmYVN5UkZpC3Hqzj0Jv0HKs8or30AGhW-mcq48ZPvVcIwd9JoyZAVvF6x_ToBMOe/s1600/subscribe-name.png) no-repeat center right;}
#ig-subscription-optin input[type="text"] {border: 1px solid #111 !important;
font-size: 15px !important;margin-bottom: 10px !important;padding: 8px 28px 8px 10px !important;width: 80% !important;height: auto !important;}
#ig-subscription-optin input.email {background: white url(https://blogger.googleusercontent.com/img/b/R29vZ2xl/AVvXsEhTXKofrovDFsUqtHR8ohbO_qskRXQYzinbyKz6c8QkoZISYWqc9WVa-88mDa0km0K1zhzefFW2KFTFeOggtFDWe5_g9QnEKEKlFEL5XryUWiZ_-JFTz_EpYOOtt-yO2XAF0MFFLMh9qkwy/s1600/subscribe-email.png) no-repeat center right;}#ig-subscription-optin input {
font-family: Georgia, Times, "Times New Roman", serif;border-radius: 3px;-moz-border-radius: 3px;-webkit-border-radius: 3px;box-shadow: 0 2px 2px #111;-moz-box-shadow: 0 2px 2px #111;-webkit-box-shadow: 0 2px 2px #111;margin: 0px;padding: 0px;}#ig-subscription-optin h3 {margin-top: 10px !important;margin-bottom: 8px !important;margin-left: 10px !important;margin-right: 10px !important;
font-weight: bold !important;line-height: 26px !important;letter-spacing: normal;
text-transform: none;text-decoration: none;
text-align: center !important;font-family: Georgia, Times, "Times New Roman", serif;
border: none;padding: 0px !important;float: none;}input:hover[type="submit"] {
background-color: #0094D2;border: 1px solid #0094D2;color: white;text-decoration: none;}input[type="submit"] {background-color: #00A7ED;border: 1px solid #0094D2;
color: white;cursor: pointer;font-family: 'Droid Sans', sans-serif !important;font-size: 13px;font-weight: normal;padding: 5px;text-decoration: none;}input {
color: #333;font-family: 'Droid Sans', sans-serif;}#ig-subscription-optin input[type="submit"] {background: #960E17 url(https://blogger.googleusercontent.com/img/b/R29vZ2xl/AVvXsEiunBvgLRyJWRpKQcok8p4ZONIcUM3SCm3NWk8gLrvVI_APCqVgLmMvW6xObaUGbX27hyZuAG9Gu7Ux67ZbK77xZ4ZG_JsGXZtI8TquS9QZJA8m5eTSKdfBHBXbGHo6zoKMS8hGUBm8VaRx/s1600/subscribe-red.png) repeat-x top;border: 1px solid #111 !important;color: white;cursor: pointer !important;font-size: 18px !important;font-weight: bold !important;
padding: 6px 0 !important;text-shadow: -1px -1px #3A060A !important;width: 90% !important;height: auto !important;line-height: 24px !important;}
#ig-subscription-optin input[type="submit"]:hover {color: #FFA5A5;}</style></div>

  • In above Codes,Replace truebloggertricks with your feedburner username.
  • It all folks! Enjoy this beautiful widget in your blog.Happy Blogging!!!
Read More

Beautiful Social Subscription Widget for Blogger

11 Comments
Beautiful Social Subscription Widget for Blogger
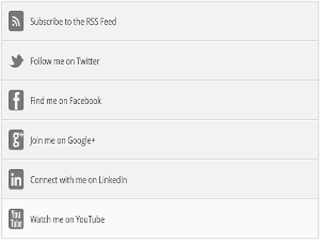
Social widgets is one of important widget in blogger blogs.They makes your users to easily spread your words all around the world.Social network also play a major role in your website traffic.Today I camed with a social widget which looks beautiful , Elegant and adopts with your blog width.This widget enable your user to connect with your blog in all top social sites like Facebook, RSS ,Twitter,Google plus, LinkedIN and Youtube.This widget is used by Chandeep in his blog.Lets see the Demo


How to Add this Widget to Blogger ?

Adding this widget to blogger is very simple just follow these steps:
  • Go to your Blogger Dashboard
  • Then Go To Layouts----> Add A Widget-----> Html Javascript
  • Just paste these Codes in your respective gadget box.

<div class="btnt-chronicl-social"><ul><li><a class="rss" href="http://feeds.feedburner.com/truebloggertricks">Subscribe to the RSS Feed</a></li> <li><a class="twitter" href="https://twitter.com/tbloggertricks">Follow me on Twitter</a></li> <li><a class="facebook" href="https://www.facebook.com/truebloggertricks">Find me on Facebook</a></li> <li><a class="google" href="https://plus.google.com/100090854666031755159" rel="author">Join me on Google+</a></li> <li><a class="linkedin" href="http://in.linkedin.com/your url">Connect with me on LinkedIn</a></li> <li><a class="youtube" href="http://www.youtube.com/user/username">Watch me on YouTube</a></li>
</ul></div><style type="text/css">.btnt-chronicl-social { width: 100%; } .btnt-chronicl-social ul { border: 1px solid #CCCCCC; margin: 0; padding: 0; } .btnt-chronicl-social ul li { list-style:none; padding: 0; text-transform: none; border-bottom: 1px solid #CCCCCC; border-top: 1px solid #FFFFFF; } .btnt-chronicl-social ul li:first-child { border-top: 0 none; } .btnt-chronicl-social ul li:last-child { border-bottom: 0 none; } .btnt-chronicl-social ul li a { background-color: #F2F2F2 !important; color: #404040; display:block; } .btnt-chronicl-social ul li a:hover { background-color: #fafafa !important; } .btnt-chronicl-social ul li .rss { background: url("http://i1203.photobucket.com/albums/bb382/chandeep10/social-icons/RSS-1.png") no-repeat scroll 10px center #F87E12; padding: 17.5px 60px; } .btnt-chronicl-social ul li .twitter { background: url("http://i1203.photobucket.com/albums/bb382/chandeep10/social-icons/Twitter.png") no-repeat scroll 10px center #4CACEE; padding: 17.5px 60px;} .btnt-chronicl-social ul li .facebook { background: url("http://i1203.photobucket.com/albums/bb382/chandeep10/social-icons/Facebook-1.png") no-repeat scroll 10px center #3B5998; padding: 17.5px 60px; } .btnt-chronicl-social ul li .google { background: url("http://i1203.photobucket.com/albums/bb382/chandeep10/social-icons/google.png") no-repeat scroll 10px center #D44937; padding: 17.5px 60px; } .btnt-chronicl-social ul li .linkedin { background: url("http://i1203.photobucket.com/albums/bb382/chandeep10/social-icons/LinkedIn-1.png") no-repeat scroll 10px center #3692C3; padding: 17.5px 60px; } .btnt-chronicl-social ul li .youtube { background: url("http://i1203.photobucket.com/albums/bb382/chandeep10/social-icons/Youtube-1.png") no-repeat scroll 10px center #C6312B; padding: 17.5px 60px; } .social-about { display: none; }</style>

Customization:

 Just replace following with your respective URL
  •  http://feeds.feedburner.com/truebloggertricks
  •  https://www.facebook.com/truebloggertricks
  • https://plus.google.com/100090854666031755159
  • http://www.youtube.com/user/username 
  • http://in.linkedin.com/your url

Thats all!If you liked this widget, please share with your friends.Happy Blogging:)
Read More

How to make Beautiful Custom 404 error page in Blogger

11 Comments
How to make Beautiful Custom 404 error page in Blogger

"The 404 or Not Found error message is a HTTP standard response code indicating that the client was able to communicate with the server, but the server could not find what was requested." In simple words the page that will be displayed when the actual page is not found is called a 404 Error Page.  Now Blogger Error pages use the same template .This would help template designers in making up custom beautiful 404 Pages.This tutorial will help you in setting up a Custom stylish mouse hover effect 404 page for your Blog.You may seen many 404 designs and images but this is very stylish and and made up of no image .This will also make your blog more professional.This is the much needed one for Every developing or developed blog. Lets see the Live Demo


By Default, your Blogger Error page will display this error message


custom 404 page for blogger


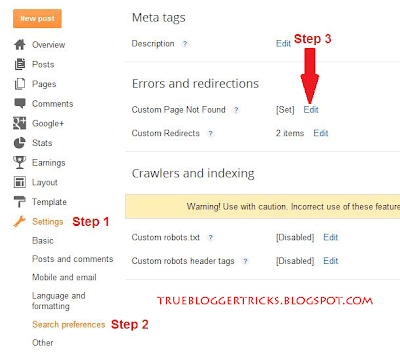
You can Customize this message beautifully to something else from the Blogger Settings.


How to make Beautiful Custom 404 error page in Blogger

 Copy the below codes and paste in that box

<style type="text/css"> #error-404 { border: 20px solid #1B1B1B; border-radius: 240px 240px 240px 240px; height: 240px; margin: 0 auto 40px; text-align: center; transition: all 0.8s ease 0s; width: 240px; } #error-404:hover { border-color: #333; } #error-404 span { color: #FA4C29; font-size: 100px; font-weight: bold; line-height: 240px; } .large-heading { font-size: 48px; line-height: 1.2em; } .light-heading { font-weight: 400; } .status-msg-bg { background-color: transparent; } .sidebar-wrapper, .page-header { display: none; } .main-wrapper { margin-right: 0; } .outer-wrapper { min-height: 0; } .status-msg-border { border: 0 none; } </style> <div id="error-404"> <span>404</span>
</div> <h1 class="large-heading" style="text-align: center;">Page not found.</h1> <h2 class="light-heading" style="text-align: center;">Please check that there isn&#8217;t a typo in your URL.</h2>

That all! You have a beautiful 404 error page in your blog.Do not forget to share and comment about this post :)
Read More

Mouse Hover Effect Email subscription widget for blogger

5 Comments
This post is written by our guest author.Check how to become a guest author in True Blogger Tricks
Mouse Hover Effect Email subscription widget for blogger
Hello Friends I Am Rajat A Co- Author At TrueBloggertricks. Today  I am sharing how to add an stylish mouse hover effect subscribe us widget which is used by lordhtml. It is A cool and simple widget that you can easily add in your blogger sidebar.  Please Continue..

How To Add An Subscribe Us Widget Like Lord Html

  • Go TO Your Blogger Dashboard
  • From The Drop Down Menu Choose Layouts
  • Then CLick On Add A Gadget
  • From The Pop Out Menu And Choose Html/Javascript
  • THen Paste The Below COding 
<style>
.subscriptionboc
{
 border-style:solid;
 border-width:2px;
 border-color:#000;
 padding:20px;
 width:250px;
    background:#fff;
transition: box-shadow .777s;
-webkit-transition: box-shadow .777s;
-moz-transition: box-shadow .777s;
-o-transition: box-shadow .777s;
-ms-transition: box-shadow .777s;
}
.subscriptionboc:hover
{
 -moz-box-shadow:    inset 0 0 10px #000000;
   -webkit-box-shadow: inset 0 0 10px #000000;
   box-shadow:         inset 0 0 10px #000000;
}
.paratraf
{
     font-size:20px;
    font-family:&#39;georgia&#39;;
    text-align:center;
color:#000;
}
.feed-links{display:none;}
.enteremail
{
   background: url("http://i1203.photobucket.com/albums/bb382/chandeep10/btnt-custom-theme/email.png") no-repeat scroll 10px center #FFFFFF;
    border-radius: 4px 4px 4px 4px;
    box-shadow: 0 0 3px rgba(0, 0, 0, 0.05) inset;
    color: #8B8B8B;
    padding: 10px 40px;
border-style:solid;
 border-width:2px;
 border-color:#CACACA;
}
.forspace
{
    padding:15px;
}
.button45
{
     background: -moz-linear-gradient(center top , #30A146 0%, #249334 100%) repeat scroll 0 0 transparent;
    border: 0 none;
    border-radius: 4px 4px 4px 4px;
    color: #FFFFFF;
    cursor: pointer;
    font-family: "Droid Sans","Lucida Grande",Tahoma,sans-serif;
    font-weight: bold;
    padding: 10px 40px;
    text-shadow: 1px 1px 0 rgba(0, 0, 0, 0.4);
    background:#249334;
    border: 0 none;
    border-radius: 4px 4px 4px 4px;
    color: #FFFFFF;
    cursor: pointer;
    font-family: "Droid Sans","Lucida Grande",Tahoma,sans-serif;
    font-weight: bold;
    padding: 10px 40px;
    text-shadow: 1px 1px 0 rgba(0, 0, 0, 0.4);
}
</style>
<div class="subscriptionboc">
    <form action="http://feedburner.google.com/fb/a/mailverify" method="post" target="popupwindow"onsubmit="window.open('http://feedburner.google.com/fb/a/mailverify?uri=truebloggertricks', 'popupwindow', 'scrollbars=yes,width=550,height=520');return true"><div class="paratraf">For Latest news And Updates Sign Up</div><p>         <div class="forspace">
            <center>
                <input class="enteremail" type="text" style="width:140px" name="email" value="Enter your email..." onfocus="if (this.value == &quot;Enter your email...&quot;) {this.value = &quot;&quot;}"/></center></div>
        </p>
   
        <input type="hidden" value="truebloggertricks" name="uri"/>
   
        <input type="hidden" name="loc" value="en_US"/>
                    <center>
        <input class="button45" type="submit" value="Sign Up" /></center></form>
</div>
  • In The above coding replace truebloggertricks with your feedburner username
  • Thats All Save The Widget


About Author Posted by Guest Author,Rajat Garg
Hello This is Rajat ,from India, I like to explore the ways of blogging, smart earning methods,Likes to clone templates.
Visit My Blog My Premium Lab | Follow Me On Twitter Or Facebook
Read More

HackingUniversity like Responsive Email Subcription widget for blogger

4 Comments
Hello friends! Today I will tell you how to add a responsive email subscription widget to your blogger blog which is used by HackingUniversity.Subscription widget is one of the most and important widget for all blogs.They makes the readers to stay with your blog post without visiting your site through mails.This Social subscription widget is made with the aim of promoting and increasing traffic of your blog in various manners. As this widget is responsive in nature,It has the potential to boost your subscribers. Your readers will also get an opportunity to connect with you blog with feedburner.Get ready to see the amazing beauty in action which will nurture your blog . Lets see the Demo

hackinguniversity like responsive subscription widget

How to Add this Widget to Blogger ?

Adding this widget to blogger is very simple just follow these steps:
  • Go to your Blogger Dashboard
  • Then Go To Layouts----> Add A Widget-----> Html Javascript
  • Just paste these Codes in your respective gadget box.
<style type='text/css'>#sidebar-subscribe-box{background:url(https://blogger.googleusercontent.com/img/b/R29vZ2xl/AVvXsEiIBgPaht6YVxXEPg2ZiKBTahVUbIurByuvN5AMQsVQYc4Z_vhDxA4m3NYXIOUu2Aoygb4c7ZxW6H7VHZaZCArDhzlx_8v0t396PopxSxwVvOehJP54GDaCA8WQB4ROS9aovfPdC7Aquvpw/s1600/colored-strip.png) repeat scroll 0 0 transparent;border:1px solid #aaa;border-radius:3px;padding:3px 0}.sidebar-subscribe-box-wrapper{background:url(https://blogger.googleusercontent.com/img/b/R29vZ2xl/AVvXsEjs9-ZKgfQOfQlnsy6ptF5juQfDv0uUluw9thhAm937VVJaxcc0Lcqq5K1Qlhf9kHCOZBtijRlTmA8tR78do_vLvYq4teWeobbvt9tAwKI8RQfZgsH229W90lguNElK_dL9FNWqZ2JFhYZb/s1600/bg-pattern.png) repeat scroll 0 0 #f7f7f7;color:#111;font-size:14px;line-height:20px;padding:1px 20px 10px;text-align:center;text-transform:uppercase}.sidebar-subscribe-box-form{clear:both;display:block;margin:10px 0}form.sidebar-subscribe-box-form{clear:both;display:block;margin:10px 0 0;width:auto}.sidebar-subscribe-box-email-field{-moz-border-radius:4px;-webkit-border-radius:4px;background:#fff url(https://blogger.googleusercontent.com/img/b/R29vZ2xl/AVvXsEgguZS5psTyrlZ1rx_s_JYzaojrzY1yTRAtHATubz2FkV5Zoh3aU_dIyAJ12qbttMkn_tJxxVyweFUC48TxGT6rkhg8Wq_PjG3df-R1AGfs5iGZmb-6gY3hPpXa7JxMrIHJ_ZKWOosZ8-DG/s1600/sprites.png) no-repeat 0 -27px;border:1px solid #ccc;border-radius:4px;color:#444;margin:0 0 15px;padding:10px 40px;width:68%}.sidebar-subscribe-box-email-button{background:#09f;border:1px solid #007fff;box-shadow:0 1px 0 rgba(255,255,255,0.3) inset, 0 1px 0 transparent;color:#fff;cursor:pointer;font-family:verdana;font-weight:700;padding:10px;text-shadow:1px 1px 0 rgba(0,0,0,.4);text-transform:uppercase;width:100%}.sidebar-subscribe-box-email-button:hover,.sidebar-subscribe-box-email-button:focus{background:#1ca4ff}.sidebar-subscribe-box-email-button:active{-moz-box-shadow:0 1px 4px rgba(0,0,0,0.5) inset;-webkit-box-shadow:0 1px 4px rgba(0,0,0,0.5) inset;box-shadow:0 1px 4px rgba(0,0,0,0.5) inset;outline:0}iframe,object,embed,.yt-border iframe,.yt-border object,.yt-border embed,table{width:100%}embed{border-radius:3px;-moz-box-shadow:0 2px 4px rgba(0,0,0,0.2);-webkit-box-shadow:0 2px 4px rgba(0,0,0,0.2);background:#FFF;border:1px solid #ddd;box-shadow:0 2px 4px rgba(0,0,0,0.2);margin:0;padding:4px 4px 4px}#footer-section{background:#f5f5f5 url(https://blogger.googleusercontent.com/img/b/R29vZ2xl/AVvXsEgQCXC_XUuwYhr0fG5jJ1b-sg4hPjF_AGzZ8ab2rBgxquBR87P-Gl0DcTlIybeDIGD_L6W3AN9eTfy6x3sJHwuYCp2xsQ6wm_pYV7U284Dqq3U8QxIOFKa05HUmkrudoReBM0pKuTHvO3Ro/s0/bg-pattern.png) repeat top left;border-top:1px solid #aaa;box-shadow:inset 0 4px 6px -3px #aaa;font-family:cambria;font-size:14px;height:100px;margin:10px -30px 5px;padding:0 30px;text-align:center;width:100%}</style>
<div id="sidebar-subscribe-box"><div class="sidebar-subscribe-box-wrapper"><p>Subscribe to our email newsletter & receive updates right in your inbox.</p><div class="sidebar-subscribe-box-form"><form action="http://feedburner.google.com/fb/a/mailverify?uri=truebloggertricks" class="sidebar-subscribe-box-form" method="post" onsubmit="window.open('http://feedburner.google.com/fb/a/mailverify?uri=truebloggertricks', 'popupwindow', 'scrollbars=yes,width=550,height=520');return true" target="popupwindow"><input name="uri" type="hidden" value="truebloggertricks" /><input name="loc" type="hidden" value="en_US" /><input class="sidebar-subscribe-box-email-field" name="email" autocomplete="off" placeholder="Enter your email address :)"/><input class="sidebar-subscribe-box-email-button" title="" type="submit" value="Subscribe Now !" /></form></div></div></div>

  • In above Codes,Replace truebloggertricks with your feedburner username.
  • It all folks! Enjoy this beautiful widget in your blog.Happy Blogging!!!
Read More

Jquery Closable Christmas wishing widget for Blogger

6 Comments
Jquery Closable Christmas wishing widget for Blogger
As Christmas is nearing , Every blogger will be thinking of wishing there users and there family.This makes the bloggers to be friendly with there visitors.There are many christmas decorative widget for blogger which can make your blog to load slow and give ugly appearance.That goodies also make your post unreadable to your users .Do you want to wish your users or make them to get away from your site??

So to avoid this, I camed with a new widget which wishes your users beautifully and attractively.This is fast loading and does not increase your blogs load time.This widget is user friendly as it comes with closeable button too.This also make your blog professional! Live preview can be viewed in this blog.want on for you blog also? Just follow these simple steps.


Jquery Closable Christmas wishing widget for Blogger


How to install this widget in your blog?

  • Go to Blogger.com and open your dashboard.
  • Go to layout menu and open a new desirable widget box and paste this codes in that.
 <style>
/*--Widget by truebloggertricks.blogspot.com--*/
#announcement{
width: auto;
font:bold 15px Trebuchet MS;
border: 2px solid #FF0000;
border-radius: 20px;
margin: 0 40px 5px 40px;
text-align: center;
padding:15px 10px 15px 70px;
background-repeat: no-repeat;
background-position: 10px center;
position:relative;
color: #FF0000;
background-color: #F9EAD4;
background-image: url('https://blogger.googleusercontent.com/img/b/R29vZ2xl/AVvXsEg7X7I4ugWliIatKSH5qRJnE7jYY0FbKVumkMhwHjQ7gv99fffEBElOmjPrEf82xFSLOCVgXHx2rdsJj8rn2kHB4yrfYgtczTayzas-XCBwhjQbUlXbMfBxQduBJeaIVtJYtr6JpRgmheU/s1600/two_christmas_bells_ringing_ty_clr.gif');
}
</style>
<script src='http://code.jquery.com/jquery-1.2.3.min.js' type='text/javascript'>
</script>
<script type='text/javascript'>
$(document).ready(function(){
$(".close").click(function(){
$("#announcement").remove();
});
$("#announcement").fadeOut(800).fadeIn(800)
.fadeOut(400).fadeIn(400)
.fadeOut(400).fadeIn(400);
});

</script>
<div id='announcement'>
<a class='close' href='#close' style='float: right;'><img border='0' src='http://cdn1.iconfinder.com/data/icons/nuvola2/16x16/actions/button_cancel.png'/></a>
<center>
Wish You a Merry Christmas to All our Visitors and Their Family.
</center></div>

Or you can use this easy install option.Just click and install this widget in your blog.


Thats all!!. We whole heartly wish a merry and happy Christmas to you and your family members. You can also share your wishes via comments.  
Read More

Ice Cream Social Sharing Widget below blogger Post

10 Comments
This post is written by our guest author.Check how to become a guest author in True Blogger Tricks
For our dear visitors we created a very awesome and professional social sharing widget for blogger which can you add below every post  of your blog and it works perfectly with blogger and you can also add it on your other websites like Wordpress, Joomla, Webs, etc.This Widget contains a spinning effect on mouse hover.

Add Social Sharing Ice Cream Widget

  • Login to Blogger > Dashboard
  • Click on Drop Down Menu and select Template
  • Backup your Template before making any changes to your blog
  • Now Click on Edit HTML > Proceed > Expand Widget Templates
  • Press Ctrl + F and search the code shown below. 
<div class='post-footer-line post-footer-line-1'/>
  • If you can't find above code then Search below code
<div class='post-footer-line post-footer-line-1'>
  •  Now Paste Below Code Just After after it.
<b:if cond='data:blog.pageType == "item"'> <style> p#socialicons img { -moz-transition:all .7s ease-in-out; -webkit-transition:all .7s ease-in-out; -o-transition:all .7s ease-in-out; -ms-transition:all .7s ease-in-out; transition:all .7s ease-in-out; } p#socialicons img:hover { -moz-transform:rotate(50deg); -webkit-transform:rotate(50deg); -o-transform:rotate(50deg); -ms-transform:rotate(50deg); transform:rotate(50deg); } </style> <center><p id='socialicons'> <a expr:href='&quot;http://www.facebook.com/sharer.php?u=&quot; + data:post.url + &quot;&amp;t=&quot; + data:post.title' rel='external nofollow' target='_blank'><img border='0' src='https://blogger.googleusercontent.com/img/b/R29vZ2xl/AVvXsEjkXjZGtL5Kq-5alZm6d2f5JX-4uz7k2K4oGCIdj6xfY8YLVk1AwLuPnnbvqJAQUQ1VkLT0IIHAtaO1dihA8kJZCOUvXqOot99RdAMYy3Pv5UnQCRbAfrbG_m-07AD8fvghgO1DuTF2zECL/s1600/facebook.png' title='Share on Facebook'/></a> <a expr:href='&quot;http://twitthis.com/twit?url=&quot; + data:post.url + &quot;&amp;title=&quot; + data:post.title' rel='external nofollow' target='_blank'><img border='0' src='https://blogger.googleusercontent.com/img/b/R29vZ2xl/AVvXsEjp_I89iK2zQa6ZUnWjODPb3jOt47pZdoBk5_OM-wFfXIsEVGQtludEreOC2p-KLCYRtxNzbnEUQO9ASoae2sQakI2SNO3Fhnwr0VVOuwLqa8BEWhZfJioHZxGr7VwlzzSYBJ12D95tL4JT/s1600/twitter.png' title='Share on Twitter'/></a> <a expr:href='&quot;http://digg.com/submit?phase=2&amp;url=&quot; + data:post.url' rel='external nofollow' target='_blank'><img border='0' src='https://blogger.googleusercontent.com/img/b/R29vZ2xl/AVvXsEiBNlHK2aQ9ssxE25DxAxSoBONI9SGHpM8NpYEHQm-uD4Xx0mxlNco3hieAQSiBDIfAQZtj04JSqk21N493WWDHL_x4m1YAUezjMw7ArdQ9GsGVOCKSheUWzlBlq32lGWU61EI8ZuyhQwjY/s1600/digg.png' title='Share on Digg'/></a> </p></center></b:if>
  • Save Your Template.
  • Say Bingo and You are Done.

    About Author
    Posted by Guest Author,Hemant Verma
    Hello This is Hemant Verma ,from Delhi, I like to make blogger hacks, Design Blogger template, Web Developing and Designing.
    Visit My Blog Widget Generators | Follow Me On Twitter Or Facebook
    Read More

    How to create a flash banner without any ad in Flashvortex

    11 Comments
    Flashvortex is a free service used to create high quality flash banners for free.But there is a ad link to Flashvortex.com which does not makes the banner professional.You can remove the flashvortex ad
    by becoming a premium member.You spend dollars for it But I am going to reveal a trick to remove flashvortex banner without any cost.Lets see how to do it.

    Live Demo :

    Without removing the ads


    Ads removed


    Step 1:

    First you need to download  SWiX flash editor software

    • Full support of Flash format version 5, 6, 7, 8, 9 and 10
    • Decompiling of SWF into SWiX-format XML
    • Syntax highlighting, code formatting, code completion
    • Preview of modified SWF files
    • Reassembly of SWiX-format XML into an SWF
    • Open XML based SWiX-format as a ZIP archive
    • Multidocument interface
    Version     1.3.0.1927 new
    License     Free for personal use
    Build     March 24, 2010
    File size     0.9 MB
    OS     XP/2000/Vista/Windows 7

    Step:  2

    1. Go to flashvortex.com
    2. choose any Flash Banner from list
    3. Fill the Following form with Required Data
    4. Click on "Generate Animation"
    5. Click On "Click Here To Download" Button To Download swf File On your PC

    How to create a flash banner without any ad in Flashvortex

    6. Open your swf file with SWiX
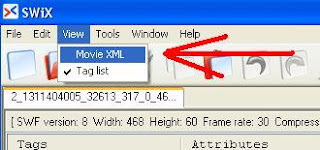
    7. Go to view at the top options and Select on Movie XML


    Now using Ctrl + f find these below codes

    <Actions>
                    <Push>
                        <String Name="http://www.flashvortex.com/referer.php?generatorId=" />
                        <String Name="generatorId" />
                    </Push>
                    <GetVariable />
                    <Add2 />
                    <Push>
                        <String Name="&amp;exampleId=" />
                    </Push>
                    <Add2 />
                    <Push>
                        <String Name="exampleId" />
                    </Push>
                    <GetVariable />
                    <Add2 />
                    <Push>
                        <String Name="_top" />
                    </Push>
                    <GetURL2 LoadVariables="false" LoadTarget="false" SendVarsMethod="None" />
                    <End />
                </Actions>

    Delete the above codes.You have remove the link to that site.

    • Now find below codes individually
     Shapeid="4"
    Shapeid="7" 
    •  Both occurs in different places.Replace the above two codes with this
     Shapeid="0"

    Thats all ! You have removed the flashvortex ad !

    Uploading :

    • Open http://sites.google.com , sign in/sign up with your Gmail account.
    • Click on edit sidebar at left side of page.
    • Click on Attachments-->>>Upload-->>Select your SWF file from PC and upload it. 
    • Now you have uploaded the Flash SWF file to Google site, you should get the URL address of the SWF file and note it. In Internet Explorer, you can simply click the file, open it with IE, and copy the link address in the address bar. 
    • If you are using Firefox, you may right click on download link and choose copy link location
    After copy link location your SWF file URL look like this :

    https://sites.google.com/site/templatedownloadzone/home/truebloggertricks.swf?attredirects=0


    but you can't use this , just remove last red colored code and after all your SWF file URL look like this:

    https://sites.google.com/site/templatedownloadzone/home/truebloggertricks.swf

    How to Embed SWF file ?

    • Replace YOUR SWF LINK with your link of .Swf file copied .
    • Replace height and width with your own banner size.
    <embed align="middle" allowscriptaccess="always" height="250" pluginspage="http://www.macromedia.com/go/getflashplayer" quality="high" src="YOUR SWF LINK" type="application/x-shockwave-flash" width="500"></embed> 

    How to use this ?

    You can copy the code and paste in desired widget box or inside the post to view this ad free flash banner.

    If you face any problems just comment below.I will help you regarding this
    Read More