Showing posts with label Post widgets. Show all posts

Ice Cream Social Sharing Widget below blogger Post

10 Comments
This post is written by our guest author.Check how to become a guest author in True Blogger Tricks
For our dear visitors we created a very awesome and professional social sharing widget for blogger which can you add below every post  of your blog and it works perfectly with blogger and you can also add it on your other websites like Wordpress, Joomla, Webs, etc.This Widget contains a spinning effect on mouse hover.

Add Social Sharing Ice Cream Widget

  • Login to Blogger > Dashboard
  • Click on Drop Down Menu and select Template
  • Backup your Template before making any changes to your blog
  • Now Click on Edit HTML > Proceed > Expand Widget Templates
  • Press Ctrl + F and search the code shown below. 
<div class='post-footer-line post-footer-line-1'/>
  • If you can't find above code then Search below code
<div class='post-footer-line post-footer-line-1'>
  •  Now Paste Below Code Just After after it.
<b:if cond='data:blog.pageType == "item"'> <style> p#socialicons img { -moz-transition:all .7s ease-in-out; -webkit-transition:all .7s ease-in-out; -o-transition:all .7s ease-in-out; -ms-transition:all .7s ease-in-out; transition:all .7s ease-in-out; } p#socialicons img:hover { -moz-transform:rotate(50deg); -webkit-transform:rotate(50deg); -o-transform:rotate(50deg); -ms-transform:rotate(50deg); transform:rotate(50deg); } </style> <center><p id='socialicons'> <a expr:href='&quot;http://www.facebook.com/sharer.php?u=&quot; + data:post.url + &quot;&amp;t=&quot; + data:post.title' rel='external nofollow' target='_blank'><img border='0' src='https://blogger.googleusercontent.com/img/b/R29vZ2xl/AVvXsEjkXjZGtL5Kq-5alZm6d2f5JX-4uz7k2K4oGCIdj6xfY8YLVk1AwLuPnnbvqJAQUQ1VkLT0IIHAtaO1dihA8kJZCOUvXqOot99RdAMYy3Pv5UnQCRbAfrbG_m-07AD8fvghgO1DuTF2zECL/s1600/facebook.png' title='Share on Facebook'/></a> <a expr:href='&quot;http://twitthis.com/twit?url=&quot; + data:post.url + &quot;&amp;title=&quot; + data:post.title' rel='external nofollow' target='_blank'><img border='0' src='https://blogger.googleusercontent.com/img/b/R29vZ2xl/AVvXsEjp_I89iK2zQa6ZUnWjODPb3jOt47pZdoBk5_OM-wFfXIsEVGQtludEreOC2p-KLCYRtxNzbnEUQO9ASoae2sQakI2SNO3Fhnwr0VVOuwLqa8BEWhZfJioHZxGr7VwlzzSYBJ12D95tL4JT/s1600/twitter.png' title='Share on Twitter'/></a> <a expr:href='&quot;http://digg.com/submit?phase=2&amp;url=&quot; + data:post.url' rel='external nofollow' target='_blank'><img border='0' src='https://blogger.googleusercontent.com/img/b/R29vZ2xl/AVvXsEiBNlHK2aQ9ssxE25DxAxSoBONI9SGHpM8NpYEHQm-uD4Xx0mxlNco3hieAQSiBDIfAQZtj04JSqk21N493WWDHL_x4m1YAUezjMw7ArdQ9GsGVOCKSheUWzlBlq32lGWU61EI8ZuyhQwjY/s1600/digg.png' title='Share on Digg'/></a> </p></center></b:if>
  • Save Your Template.
  • Say Bingo and You are Done.

    About Author
    Posted by Guest Author,Hemant Verma
    Hello This is Hemant Verma ,from Delhi, I like to make blogger hacks, Design Blogger template, Web Developing and Designing.
    Visit My Blog Widget Generators | Follow Me On Twitter Or Facebook
    Read More

    Being viewed or Random post widget like spiceupyourblog for blogger

    37 Comments
    blogger widgets, plugins, seo
    Hi friends, today I had made an interesting widget for you all. This is really interesting. Its titled as "Being Viewed". You can give him any title but the title was choose by Paul Crowe. Actually he had created the widget but hasn't shared the trick or code of the widget. So I thought that everything we knew must be known to all. So I was creating the widget for these 2 days and at last, success was the result and so I was happy.


    Live Demo:


    The images and post showing above updated every-time and they are showing the posts which are being viewed at the moment.

    What Are The Main Advantages Of The Widget ?

    • Shows Random Posts.
    • Shows the Name Of The Author.
    • Shows the number of comments.
    • Summary Showing Enabled.
    • CSS Added.
    • Hover effect for images.

    Installing It On Your Blog

    This is actually a widget which is re-sizes automatically and also you don't have to add any extra codes on your template too. Just follow these steps : 


    OR

    • Go to blogger.
    • Open layout tab.
    • Click on Add A Widget button anywhere on the blogger layout.
    • Give any title you want [ eg: Being Viewed, Recently Viewed, Now Viewing etc. Its up to you. ].
    • In the content column, paste the code given below : 

    <style type="text/css"><!--
    .recent_post_content_item {filter: alpha(opacity=80);opacity: 0.8;}
    .recent_post_content img {width:48px;height:48px;background-position: center;margin:7px;padding: 2px;border:#888 solid thin;}
    .recent_post_content_item table, .recent_post_content_item tr, .recent_post_content_item td {vertical-align: middle;}
    .recent_post_content_item table {margin-bottom:2px;margin-top:3px;}
    .recent_post_content_item:hover {filter: alpha(opacity=100);opacity: 1;}
    .recent_post_title a{font-size:12px;text-decoration:none;font-weight:bold;color:inherit}
    .recent_post_title a:hover{text-decoration:underline}
    .recent_post_content_item .recent_post_info {filter: alpha(opacity=60);opacity: 0.6;font-size: 11px;}
    --></style>
    <script type="text/JavaScript">
    <!--
    //Setting_begin
    var No_Thumb_Url='http://www.ezeego1.co.in/ezeego1.cms/static/images/noimage.jpg';
    var Max_Post_Display=5;
    var Sum_Len='0';
    //Setting_end
    //Define your language
    var Lang_By = 'By ';
    var Lang_comment = ' comment';
    var Lang_comments = ' comments';
    //For valid feed, not touch

    var _0xc4c0=["\x75\x20\x46\x28\x4E\x2C\x48\x2C\x6F\x2C\x65\x2C\x4F\x29\x7B\x37\x20\x4A\x3D\x27\x27\x3B\x35\x28\x48\x21\x3D\x27\x27\x29\x4A\x3D\x27\x2F\x2D\x2F\x27\x2B\x48\x3B\x37\x20\x51\x3D\x27\x27\x3B\x35\x28\x6F\x21\x3D\x27\x27\x29\x51\x3D\x27\x6F\x2D\x31\x71\x3D\x27\x2B\x6F\x2B\x27\x26\x27\x3B\x37\x20\x4D\x3D\x27\x27\x3B\x35\x28\x65\x21\x3D\x27\x27\x29\x4D\x3D\x27\x65\x2D\x31\x74\x3D\x27\x2B\x65\x2B\x27\x26\x27\x3B\x31\x38\x2E\x31\x39\x28\x27\x3C\x55\x20\x4E\x3D\x22\x31\x70\x2F\x31\x6F\x22\x20\x50\x3D\x22\x2E\x2E\x2F\x2E\x2E\x2F\x31\x6E\x2F\x27\x2B\x4E\x2B\x27\x2F\x36\x27\x2B\x4A\x2B\x27\x3F\x27\x2B\x51\x2B\x4D\x2B\x27\x31\x72\x3D\x64\x2D\x63\x2D\x55\x26\x4F\x3D\x27\x2B\x4F\x2B\x27\x22\x3E\x3C\x5C\x2F\x55\x3E\x27\x29\x7D\x75\x20\x4B\x28\x64\x29\x7B\x37\x20\x31\x31\x3D\x2F\x3C\x5C\x53\x5B\x5E\x3E\x5D\x2A\x3E\x2F\x67\x3B\x32\x2E\x73\x3D\x41\x28\x64\x2E\x43\x2E\x49\x24\x31\x76\x2E\x24\x74\x29\x3B\x32\x2E\x6F\x3D\x41\x28\x64\x2E\x43\x2E\x49\x24\x31\x73\x2E\x24\x74\x29\x3B\x32\x2E\x44\x3D\x41\x28\x64\x2E\x43\x2E\x49\x24\x31\x75\x2E\x24\x74\x29\x3B\x32\x2E\x45\x3D\x66\x20\x68\x28\x29\x3B\x32\x2E\x6B\x3D\x66\x20\x68\x28\x29\x3B\x32\x2E\x62\x3D\x66\x20\x68\x28\x29\x3B\x32\x2E\x36\x3D\x66\x20\x68\x28\x29\x3B\x32\x2E\x79\x3D\x66\x20\x68\x28\x29\x3B\x32\x2E\x71\x3D\x66\x20\x68\x28\x29\x3B\x32\x2E\x42\x3D\x66\x20\x68\x28\x29\x3B\x32\x2E\x72\x3D\x66\x20\x68\x28\x29\x3B\x32\x2E\x76\x3D\x66\x20\x68\x28\x29\x3B\x32\x2E\x38\x3D\x32\x2E\x73\x2D\x32\x2E\x6F\x2B\x31\x3B\x35\x28\x32\x2E\x38\x3E\x32\x2E\x44\x29\x32\x2E\x38\x3D\x32\x2E\x44\x3B\x54\x28\x37\x20\x69\x3D\x30\x3B\x69\x3C\x32\x2E\x38\x3B\x69\x2B\x2B\x29\x7B\x32\x2E\x79\x5B\x69\x5D\x3D\x27\x27\x3B\x32\x2E\x71\x5B\x69\x5D\x3D\x27\x23\x27\x3B\x32\x2E\x42\x5B\x69\x5D\x3D\x27\x27\x3B\x35\x28\x31\x32\x20\x31\x35\x21\x3D\x27\x31\x69\x27\x29\x32\x2E\x42\x5B\x69\x5D\x3D\x31\x35\x3B\x32\x2E\x45\x5B\x69\x5D\x3D\x27\x27\x3B\x32\x2E\x6B\x5B\x69\x5D\x3D\x27\x27\x3B\x32\x2E\x62\x5B\x69\x5D\x3D\x27\x23\x27\x3B\x32\x2E\x36\x5B\x69\x5D\x3D\x30\x3B\x32\x2E\x72\x5B\x69\x5D\x3D\x27\x27\x3B\x35\x28\x31\x32\x20\x31\x34\x21\x3D\x27\x31\x69\x27\x29\x32\x2E\x72\x5B\x69\x5D\x3D\x31\x34\x3B\x32\x2E\x76\x5B\x69\x5D\x3D\x27\x27\x3B\x37\x20\x34\x3D\x64\x2E\x43\x2E\x34\x5B\x69\x5D\x3B\x35\x28\x27\x31\x33\x27\x63\x20\x34\x29\x32\x2E\x45\x5B\x69\x5D\x3D\x34\x2E\x31\x33\x2E\x24\x74\x3B\x35\x28\x27\x6B\x27\x63\x20\x34\x29\x32\x2E\x6B\x5B\x69\x5D\x3D\x34\x2E\x6B\x2E\x24\x74\x3B\x35\x28\x27\x62\x27\x63\x20\x34\x29\x7B\x54\x28\x37\x20\x6A\x3D\x30\x3B\x6A\x3C\x34\x2E\x62\x2E\x47\x3B\x6A\x2B\x2B\x29\x7B\x35\x28\x34\x2E\x62\x5B\x6A\x5D\x2E\x31\x46\x3D\x3D\x27\x31\x4C\x27\x29\x7B\x32\x2E\x62\x5B\x69\x5D\x3D\x34\x2E\x62\x5B\x6A\x5D\x2E\x52\x3B\x31\x4E\x7D\x7D\x35\x28\x6A\x3D\x3D\x34\x2E\x62\x2E\x47\x29\x32\x2E\x62\x5B\x69\x5D\x3D\x27\x23\x27\x7D\x35\x28\x27\x36\x27\x63\x20\x34\x29\x32\x2E\x36\x5B\x69\x5D\x3D\x34\x2E\x36\x2E\x24\x74\x3B\x32\x2E\x36\x5B\x69\x5D\x3D\x32\x2E\x36\x5B\x69\x5D\x2E\x31\x49\x28\x31\x31\x2C\x27\x27\x29\x3B\x35\x28\x32\x2E\x36\x5B\x69\x5D\x2E\x47\x3E\x5A\x29\x7B\x32\x2E\x36\x5B\x69\x5D\x3D\x32\x2E\x36\x5B\x69\x5D\x2E\x31\x48\x28\x30\x2C\x5A\x29\x2B\x27\x2E\x2E\x2E\x27\x7D\x35\x28\x27\x6D\x27\x63\x20\x34\x29\x7B\x35\x28\x27\x56\x27\x63\x20\x34\x2E\x6D\x5B\x30\x5D\x29\x7B\x32\x2E\x79\x5B\x69\x5D\x3D\x34\x2E\x6D\x5B\x30\x5D\x2E\x56\x2E\x24\x74\x7D\x35\x28\x27\x71\x27\x63\x20\x34\x2E\x6D\x5B\x30\x5D\x29\x32\x2E\x71\x5B\x69\x5D\x3D\x34\x2E\x6D\x5B\x30\x5D\x2E\x71\x2E\x24\x74\x3B\x35\x28\x27\x57\x24\x59\x27\x63\x20\x34\x2E\x6D\x5B\x30\x5D\x29\x7B\x32\x2E\x42\x5B\x69\x5D\x3D\x34\x2E\x6D\x5B\x30\x5D\x2E\x57\x24\x59\x2E\x50\x7D\x7D\x35\x28\x27\x58\x24\x31\x37\x27\x63\x20\x34\x29\x32\x2E\x72\x5B\x69\x5D\x3D\x34\x2E\x58\x24\x31\x37\x2E\x31\x4A\x3B\x35\x28\x27\x31\x6B\x24\x73\x27\x63\x20\x34\x29\x32\x2E\x76\x5B\x69\x5D\x3D\x34\x2E\x31\x6B\x24\x73\x2E\x24\x74\x7D\x4C\x20\x32\x7D\x75\x20\x31\x63\x28\x38\x2C\x65\x29\x7B\x35\x28\x38\x3D\x3D\x65\x29\x7B\x4C\x20\x38\x7D\x37\x20\x78\x3D\x30\x3B\x37\x20\x6E\x3D\x30\x3B\x35\x28\x65\x3E\x38\x29\x7B\x6E\x3D\x65\x2D\x38\x3B\x78\x3D\x38\x7D\x31\x6D\x7B\x6E\x3D\x38\x2D\x65\x3B\x78\x3D\x65\x7D\x6E\x3D\x31\x67\x2E\x31\x4B\x28\x31\x67\x2E\x31\x77\x28\x29\x2A\x6E\x29\x3B\x4C\x28\x6E\x2B\x78\x29\x7D\x46\x28\x27\x31\x68\x27\x2C\x27\x27\x2C\x27\x27\x2C\x27\x30\x27\x2C\x27\x31\x65\x27\x29\x3B\x75\x20\x31\x65\x28\x64\x29\x7B\x31\x66\x3D\x4B\x28\x64\x29\x3B\x31\x64\x3D\x31\x66\x2E\x73\x3B\x70\x3D\x31\x64\x2D\x31\x6C\x3B\x35\x28\x70\x3C\x31\x29\x70\x3D\x31\x3B\x70\x3D\x31\x63\x28\x31\x2C\x70\x29\x3B\x46\x28\x27\x31\x68\x27\x2C\x27\x27\x2C\x27\x27\x2B\x70\x2B\x27\x27\x2C\x27\x27\x2B\x31\x6C\x2B\x27\x27\x2C\x27\x31\x6A\x27\x29\x7D\x75\x20\x31\x6A\x28\x64\x29\x7B\x37\x20\x39\x3D\x4B\x28\x64\x29\x3B\x37\x20\x33\x3D\x22\x22\x3B\x54\x28\x37\x20\x69\x3D\x30\x3B\x69\x3C\x39\x2E\x38\x3B\x69\x2B\x2B\x29\x7B\x33\x2B\x3D\x27\x3C\x6C\x20\x7A\x3D\x22\x31\x4D\x22\x3E\x27\x3B\x33\x2B\x3D\x27\x3C\x31\x30\x20\x31\x61\x3D\x22\x30\x25\x22\x20\x31\x47\x3D\x22\x30\x22\x3E\x27\x3B\x33\x2B\x3D\x27\x3C\x31\x62\x3E\x27\x3B\x33\x2B\x3D\x27\x3C\x77\x3E\x27\x3B\x33\x2B\x3D\x27\x3C\x61\x20\x52\x3D\x22\x27\x2B\x39\x2E\x62\x5B\x69\x5D\x2B\x27\x22\x20\x6B\x3D\x22\x27\x2B\x39\x2E\x36\x5B\x69\x5D\x2B\x27\x22\x3E\x27\x3B\x33\x2B\x3D\x27\x3C\x31\x7A\x20\x50\x3D\x22\x27\x2B\x39\x2E\x72\x5B\x69\x5D\x2B\x27\x22\x20\x31\x61\x3D\x22\x31\x36\x22\x20\x31\x79\x3D\x22\x31\x36\x22\x2F\x3E\x27\x3B\x33\x2B\x3D\x27\x3C\x2F\x61\x3E\x27\x3B\x33\x2B\x3D\x27\x3C\x2F\x77\x3E\x27\x3B\x33\x2B\x3D\x27\x3C\x77\x3E\x27\x3B\x33\x2B\x3D\x27\x3C\x6C\x20\x7A\x3D\x22\x31\x78\x22\x3E\x27\x3B\x33\x2B\x3D\x27\x3C\x61\x20\x52\x3D\x22\x27\x2B\x39\x2E\x62\x5B\x69\x5D\x2B\x27\x22\x20\x6B\x3D\x22\x27\x2B\x39\x2E\x36\x5B\x69\x5D\x2B\x27\x22\x3E\x27\x3B\x33\x2B\x3D\x39\x2E\x6B\x5B\x69\x5D\x3B\x33\x2B\x3D\x27\x3C\x2F\x61\x3E\x27\x3B\x33\x2B\x3D\x27\x3C\x2F\x6C\x3E\x27\x3B\x33\x2B\x3D\x27\x3C\x6C\x20\x7A\x3D\x22\x31\x41\x22\x3E\x27\x3B\x33\x2B\x3D\x28\x31\x42\x2B\x39\x2E\x79\x5B\x69\x5D\x2B\x27\x20\x2D\x20\x27\x2B\x39\x2E\x76\x5B\x69\x5D\x29\x3B\x35\x28\x41\x28\x39\x2E\x76\x5B\x69\x5D\x29\x3E\x31\x29\x7B\x33\x2B\x3D\x31\x45\x7D\x31\x6D\x7B\x33\x2B\x3D\x31\x44\x7D\x33\x2B\x3D\x27\x3C\x2F\x6C\x3E\x27\x3B\x33\x2B\x3D\x27\x3C\x2F\x77\x3E\x27\x3B\x33\x2B\x3D\x27\x3C\x2F\x31\x62\x3E\x27\x3B\x33\x2B\x3D\x27\x3C\x2F\x31\x30\x3E\x27\x3B\x33\x2B\x3D\x27\x3C\x2F\x6C\x3E\x27\x7D\x33\x3D\x27\x3C\x6C\x20\x7A\x3D\x22\x31\x43\x22\x3E\x27\x2B\x33\x2B\x27\x3C\x2F\x6C\x3E\x27\x3B\x31\x38\x2E\x31\x39\x28\x33\x29\x7D","\x7C","\x73\x70\x6C\x69\x74","\x7C\x7C\x74\x68\x69\x73\x7C\x73\x74\x72\x5F\x6F\x75\x74\x7C\x65\x6E\x74\x72\x79\x7C\x69\x66\x7C\x73\x75\x6D\x6D\x61\x72\x79\x7C\x76\x61\x72\x7C\x6D\x69\x6E\x7C\x52\x70\x6F\x73\x74\x7C\x7C\x6C\x69\x6E\x6B\x7C\x69\x6E\x7C\x6A\x73\x6F\x6E\x7C\x6D\x61\x78\x7C\x6E\x65\x77\x7C\x7C\x4F\x62\x6A\x65\x63\x74\x7C\x7C\x7C\x74\x69\x74\x6C\x65\x7C\x64\x69\x76\x7C\x61\x75\x74\x68\x6F\x72\x7C\x64\x69\x66\x66\x7C\x73\x74\x61\x72\x74\x7C\x6D\x69\x6E\x5F\x69\x6E\x64\x65\x78\x7C\x75\x72\x69\x7C\x74\x68\x75\x6D\x62\x7C\x74\x6F\x74\x61\x6C\x7C\x7C\x66\x75\x6E\x63\x74\x69\x6F\x6E\x7C\x63\x6D\x7C\x74\x64\x7C\x72\x6D\x69\x6E\x7C\x61\x75\x6E\x61\x6D\x65\x7C\x63\x6C\x61\x73\x73\x7C\x70\x61\x72\x73\x65\x49\x6E\x74\x7C\x61\x76\x61\x74\x61\x72\x7C\x66\x65\x65\x64\x7C\x69\x74\x65\x6D\x7C\x70\x75\x62\x7C\x46\x65\x65\x64\x5F\x43\x61\x6C\x6C\x7C\x6C\x65\x6E\x67\x74\x68\x7C\x6C\x61\x62\x65\x6C\x7C\x6F\x70\x65\x6E\x53\x65\x61\x72\x63\x68\x7C\x64\x69\x72\x7C\x46\x65\x65\x64\x5F\x50\x61\x72\x73\x65\x7C\x72\x65\x74\x75\x72\x6E\x7C\x6D\x61\x78\x5F\x72\x65\x73\x75\x6C\x74\x7C\x74\x79\x70\x65\x7C\x63\x61\x6C\x6C\x62\x61\x63\x6B\x7C\x73\x72\x63\x7C\x73\x74\x61\x72\x74\x5F\x69\x6E\x64\x65\x78\x7C\x68\x72\x65\x66\x7C\x7C\x66\x6F\x72\x7C\x73\x63\x72\x69\x70\x74\x7C\x6E\x61\x6D\x65\x7C\x67\x64\x7C\x6D\x65\x64\x69\x61\x7C\x69\x6D\x61\x67\x65\x7C\x53\x75\x6D\x5F\x4C\x65\x6E\x7C\x74\x61\x62\x6C\x65\x7C\x72\x65\x7C\x74\x79\x70\x65\x6F\x66\x7C\x70\x75\x62\x6C\x69\x73\x68\x65\x64\x7C\x4E\x6F\x5F\x54\x68\x75\x6D\x62\x5F\x55\x72\x6C\x7C\x4E\x6F\x5F\x41\x76\x61\x74\x61\x72\x5F\x55\x72\x6C\x7C\x33\x32\x70\x78\x7C\x74\x68\x75\x6D\x62\x6E\x61\x69\x6C\x7C\x64\x6F\x63\x75\x6D\x65\x6E\x74\x7C\x77\x72\x69\x74\x65\x7C\x77\x69\x64\x74\x68\x7C\x74\x72\x7C\x52\x61\x6E\x64\x6F\x6D\x7C\x54\x6F\x74\x61\x6C\x5F\x50\x6F\x73\x74\x7C\x47\x65\x74\x5F\x54\x6F\x74\x61\x6C\x5F\x50\x6F\x73\x74\x7C\x6A\x50\x6F\x73\x74\x7C\x4D\x61\x74\x68\x7C\x70\x6F\x73\x74\x73\x7C\x75\x6E\x64\x65\x66\x69\x6E\x65\x64\x7C\x52\x61\x6E\x64\x6F\x6D\x5F\x50\x6F\x73\x74\x5F\x53\x68\x6F\x77\x7C\x74\x68\x72\x7C\x4D\x61\x78\x5F\x50\x6F\x73\x74\x5F\x44\x69\x73\x70\x6C\x61\x79\x7C\x65\x6C\x73\x65\x7C\x66\x65\x65\x64\x73\x7C\x4A\x61\x76\x61\x53\x63\x72\x69\x70\x74\x7C\x74\x65\x78\x74\x7C\x69\x6E\x64\x65\x78\x7C\x61\x6C\x74\x7C\x73\x74\x61\x72\x74\x49\x6E\x64\x65\x78\x7C\x72\x65\x73\x75\x6C\x74\x73\x7C\x69\x74\x65\x6D\x73\x50\x65\x72\x50\x61\x67\x65\x7C\x74\x6F\x74\x61\x6C\x52\x65\x73\x75\x6C\x74\x73\x7C\x72\x61\x6E\x64\x6F\x6D\x7C\x72\x65\x63\x65\x6E\x74\x5F\x70\x6F\x73\x74\x5F\x74\x69\x74\x6C\x65\x7C\x68\x65\x69\x67\x68\x74\x7C\x69\x6D\x67\x7C\x72\x65\x63\x65\x6E\x74\x5F\x70\x6F\x73\x74\x5F\x69\x6E\x66\x6F\x7C\x4C\x61\x6E\x67\x5F\x42\x79\x7C\x72\x65\x63\x65\x6E\x74\x5F\x70\x6F\x73\x74\x5F\x63\x6F\x6E\x74\x65\x6E\x74\x7C\x4C\x61\x6E\x67\x5F\x63\x6F\x6D\x6D\x65\x6E\x74\x7C\x4C\x61\x6E\x67\x5F\x63\x6F\x6D\x6D\x65\x6E\x74\x73\x7C\x72\x65\x6C\x7C\x62\x6F\x72\x64\x65\x72\x7C\x73\x75\x62\x73\x74\x72\x69\x6E\x67\x7C\x72\x65\x70\x6C\x61\x63\x65\x7C\x75\x72\x6C\x7C\x66\x6C\x6F\x6F\x72\x7C\x61\x6C\x74\x65\x72\x6E\x61\x74\x65\x7C\x72\x65\x63\x65\x6E\x74\x5F\x70\x6F\x73\x74\x5F\x63\x6F\x6E\x74\x65\x6E\x74\x5F\x69\x74\x65\x6D\x7C\x62\x72\x65\x61\x6B","","\x66\x72\x6F\x6D\x43\x68\x61\x72\x43\x6F\x64\x65","\x72\x65\x70\x6C\x61\x63\x65","\x5C\x77\x2B","\x5C\x62","\x67"];eval(function (_0x5cedx1,_0x5cedx2,_0x5cedx3,_0x5cedx4,_0x5cedx5,_0x5cedx6){_0x5cedx5=function (_0x5cedx3){return (_0x5cedx3<_0x5cedx2?_0xc4c0[4]:_0x5cedx5(parseInt(_0x5cedx3/_0x5cedx2)))+((_0x5cedx3=_0x5cedx3%_0x5cedx2)>35?String[_0xc4c0[5]](_0x5cedx3+29):_0x5cedx3.toString(36));} ;if(!_0xc4c0[4][_0xc4c0[6]](/^/,String)){while(_0x5cedx3--){_0x5cedx6[_0x5cedx5(_0x5cedx3)]=_0x5cedx4[_0x5cedx3]||_0x5cedx5(_0x5cedx3);} ;_0x5cedx4=[function (_0x5cedx5){return _0x5cedx6[_0x5cedx5];} ];_0x5cedx5=function (){return _0xc4c0[7];} ;_0x5cedx3=1;} ;while(_0x5cedx3--){if(_0x5cedx4[_0x5cedx3]){_0x5cedx1=_0x5cedx1[_0xc4c0[6]]( new RegExp(_0xc4c0[8]+_0x5cedx5(_0x5cedx3)+_0xc4c0[8],_0xc4c0[9]),_0x5cedx4[_0x5cedx3]);} ;} ;return _0x5cedx1;} (_0xc4c0[0],62,112,_0xc4c0[3][_0xc4c0[2]](_0xc4c0[1]),0,{}));
    -->
    </script><script type="text/JavaScript" src="../../feeds/posts/summary?max-results=0&amp;alt=json-in-script&amp;callback=Get_Total_Post"></script><script type="text/JavaScript" src="../../feeds/posts/summary?start-index=50&amp;max-results=1&amp;alt=json-in-script&amp;callback=Random_Post_Show"></script>


    • You can also display more or less post by changing 5 in the script
    • Don't feel afraid by seeing such a large code. Its works fine.
    Please use this widget on your blog and this widget is completely link free too. So this widget will not link to any other blog. This widget will give you an increase in the total blog traffic.

    Read More

    How to add Cool metro style Social Sharing Widget below Blog Post

    11 Comments
     Cool metro style Social Sharing Widget below Blog Post

    Social Media play a very important role for every blog or website. With the help of social media, it can get more traffic, visitors and readers to your blog or website. Every social media have unique social sharing buttons designed by their developers. Therefore, we need to add these social sharing buttons in our blog or website to gain more traffic, visitors and readers. Actually, I already shared many kinds of social sharing buttons here in TrueBloggerTricks. And today, I'm gonna share to you another style. It is different from all others because each button has a different background. These social sharing buttons contains twitter tweet, facebook like and google +1. So, If you want to add this widget below your blogger blog post, then just follow the steps given below.

    Steps to Add This Widget Below Your Blog Post

    Steps.

    • Login to your Blogger Dashboard.
    • Click the drop-down menu and select Template.
    • Backup your Template before making any changes.
    • Click Edit HTML ---> Proceed ---> Expand Widget Templates.
    • Click Ctrl+F and search the code below:

    <data:post.body/>
    If you have more than one of this in your template and confused about which one to use, search for <div class='post-footer-line post-footer-line-1'/> instead.
    • Just below/after the <data:post.body/> or <div class='post-footer-line post-footer-line-1'/>, Paste the code below:

    <b:if cond="data:blog.pageType == &quot;item&quot;">
    <style>
    .promote_post_bg {
        height: 103px;
        background: url(http://1.bp.blogspot.com/-0XK7JZR6VAw/UIC9BwXIMyI/AAAAAAAAAN4/NjbbeWgyV5M/s1600/Cool+Social+Sharing+Widget.png) 0 -7px no-repeat;
        width: 500px;
        margin-left: 65px;}
    .promote_twitter {
        width: 130px;
        height: 38px;
        float: left;
        margin: 0 39px 0 0;
        padding: 65px 0 0 13px;
        text-align: center;}
    .promote_facebook {
        width: 115px;
        height: 40px;
        float: left;
        margin: 0 39px 0 0;
        padding: 63px 0 0 28px;
        text-align: center;}
     .promote_google {
        width: 65px;
        height: 40px;
        float: left;
        margin: 0 39px 0 0;
        padding: 65px 0 0 28px;
        text-align: center;
    }
    </style>
    <div class="promote_post_bg">
    <div class="promote_twitter">
    <a class="twitter-share-button" data-via="tbloggertricks" href="https://twitter.com/share">Tweet</a>
    <script>
                    !
                    function (d, s, id) {
                        var js, fjs = d.getElementsByTagName(s)[0];
                        if (!d.getElementById(id)) {
                            js = d.createElement(s);
                            js.id = id;
                            js.src = "//platform.twitter.com/widgets.js";
                            fjs.parentNode.insertBefore(js, fjs);
                        }
                    }(document, "script", "twitter-wjs");
             
    </script></div>
    <div class="promote_facebook">
    <fb:like action="like" colorscheme="light" expr:href="data:post.canonicalUrl" font="verdana" layout="button_count" send="false" show_faces="false"></fb:like>
    <div>
    <b:if cond="data:post.isFirstPost">
    <script>
                            (function (d) {
                                var js, id = 'facebook-jssdk';
                                if (d.getElementById(id)) {
                                    return;
                                }
                                js = d.createElement('script');
                                js.id = id;
                                js.async = true;
                                js.src = "//connect.facebook.net/en_US/all.js#xfbml=1";
                                d.getElementsByTagName('head')[0].appendChild(js);
                            }(document));
                     
    </script>
    </b:if></div>
    </div>
    <div class="promote_google">
    <g:plusone annotation="none" size="medium"></g:plusone>
    <script type="text/javascript">
                    (function () {
                        var po = document.createElement('script');
                        po.type = 'text/javascript';
                        po.async = true;
                        po.src = 'https://apis.google.com/js/plusone.js';
                        var s = document.getElementsByTagName('script')[0];
                        s.parentNode.insertBefore(po, s);
                    })();
             
    </script></div>
    </div>
    </b:if>
    • Now click Save Template.
    Need Help? If you are facing any problem to implement these sharing buttons in your blog. Please feel free to add your comment. I will try to resolve it in time. I hope you enjoyed this tutorial! Looking forward for your feedback. Thanks!
    Read More

    How to add unique like and tweet box for all post in blogger homepage

    5 Comments
    How to Add Like & Tweet Box On Every Single Post On Blogger Homepage
    Today, this easy tutorial will guide you "How to Add Facebook Like and Twitter Tweet Buttons Box On Every Single Post On Blogger Blog Homepage?". I am sure your readers will like these buttons on your blog. Because social networking is the most powerful way for increase traffic to your blog.

    Facebook Like, Twitter Tweet and Google +1 are the three main online systems for spreading your post all over the world, more likes and tweets you have more post is shared and you will get more views. Make your blog more attractive by adding these buttons with the help of simple CSS code.

    How to Add Like & Tweet Box On Every Single Post On Blogger Homepage

    • Go to Blogger Dashboard > Template > Edit HTML > Proceed
    • Take Backup Of Your Template Before Make Any Changes
    • Now Click Expand Widget Templates and Press Ctrl + F and Search For ]]></b:skin> Code and Paste The Below Code Right Above It.   

       .post-homepage-share{box-shadow: 0 5px 5px -5px #999;-webkit-box-shadow: 0 5px 5px -5px #999;-moz-box-shadow: 0 5px 5px -5px #999;-moz-border-radius:3px;-webkit-border-radius:3px;border-radius:3px;float:right;width:130px;height:65px;background: #f9f9f9;border:1px solid #ddd;margin:5px 0 0 10px;padding:5px 10px 2px 0}
    • 3. Now again make a search for <div class='post-header'> and paste the below code right below it.
    <b:if cond='data:blog.pageType != &quot;item&quot;'><div class='post-homepage-share'><span style='float:right'><a class='twitter-share-button' data-count='vertical' expr:data-text='data:post.title' expr:data-url='data:post.url' href='http://twitter.com/share'/></span><span style='float:right;padding-right:5px'><div class='fb-like' data-font='verdana' data-layout='box_count' data-send='false' data-show-faces='false' expr:href='data:post.url'/></span></div></b:if>
    • If you already had facebook and twitter pulgin avoid this step.Place this code before </head>
     <script src='http://platform.twitter.com/widgets.js' type='text/javascript'></script>

    Now codes are placed and you can save your template, now refresh your blog and see if like and tweet box has loaded or not, if you think that the box is getting too much up or too much low you can change the margin value in the above code in red color.

    Note : Using these Like and Tweet for every single post on your blog may make your blog a little slow, as everytime a person loads your homepage additional requests for like and tweet buttons will be carried out so try using it if it fits best than enjoy :)
    Read More

    How to make a link to open 30 time in a single click

    6 Comments
    Hello friends! As you all might have open your respective blogs already, Tell me what is the most difficult challenge in blogging? Probably (according to me) it's traffic ya. I mean other things like writing posts, designing a good blog, etc. comes under our knowledge, but getting plenty of traffic is really hard. Just we open a very informative blog but others don't see it, then what's that blog value?
    It's a complete zero. So today I am going to unleash a very useful trick to you all. This tutorial will increase the pageviews of you blog by 4x. Can you believe that? You may not, but it's really the true fact. 
    increase-visits
    What are you waiting for. Procure below very fast.

    (NOTE:You guys must have at least some traffic initially. This trick only work for those who have a bit traffic initially.)

    What it does is that you will keeping a button with a link and as soon as somebody clicks on it your site will be opened at once in more than 30 tabs/windows. Now say me wont your site pageviews be boosted. Let's proceed then;

    • Go to your dashboard.
    • Be forwarded to design>layout.
    • Click on Add A Gadget in the place where you want to place the link.
    • Scroll down and click on Html/Javascript.
    • Copy the below code and paste it in the content box
    <script>
    function open_win() 
    {
    for(i=0;i<=750;i++)
    window.open("http://truebloggertricks.blogspot.com");
    }
    </script>
    
    <form>
    
    <input type="button" value="Click Here" onclick="open_win()" />
    </form>
    

    1. Change "http://truebloggertricks.blogspot.com " to your own blog URL.
    • Finally click on save button and you are done.
    You can also keep this button in a post or anywhere you desire. For it just paste this code by switching to HTML mode(for editors) and if it already then directly paste the code.You can use this trick while commenting in other blog
    A live example of this tutorial is given below. Clicking on the button below will open Truebloggertricks home page many times.


    I hope you enjoyed the tutorial.
    Read More

    How to Add Drop Shadows Effect to Images in blogger

    With drop shadows effect to images, our blog images will given a kind of shadow which will surround beside the images. So, the images will look attractive. This effect is active when you put your cursor on the picture, then the picture will expand and there are drop shadows effect. For additional info, drop shadows effect is used CSS (CSS 3), so your blog is not too heavy. Now, if you want to know how to add drop shadows effect to images, just follow the steps below.

    1. Log in to your blogger account

    2. Go to Design --> Edit HTML

    3. Copy the code below, and paste above ]]></b:skin>

    .truebloggertricks-CSS3 img{
    -webkit-transform:scale(0.7); /*Webkit 0.7 times the original Image size*/
    -moz-transform:scale(0.7); /*Mozilla 0.7 times the original Image size*/
    -o-transform:scale(0.7); /*Opera 0.7 times the original Image size*/
    -webkit-transition-duration: 0.5s; /*Webkit: Animation duration*/
    -moz-transition-duration: 0.5s; /*Mozilla Animation duration*/
    -o-transition-duration: 0.5s; /*Opera Animation duration*/
    opacity: 0.5;
    margin: 0 10px 5px 0;
    }

    .truebloggertricks-CSS3 img:hover{
    -webkit-transform:scale(1.1); /*Webkit: 0.5 times the original Image size*/
    -moz-transform:scale(1.1); /*Mozilla 0.5 times the original Image size*/
    -o-transform:scale(1.1); /*Opera 0.5 times the original Image size*/
    box-shadow:0px 0px 30px gray;
    -webkit-box-shadow:0px 0px 30px gray;
    -moz-box-shadow:0px 0px 30px gray;
    opacity: 1;
    }
    4. Then, when you will use drop shadow effects to images, use this code
    <div class="truebloggertricks-CSS3">
    <img src="IMAGE URL" />
    </div>
    => Change IMAGE URL with your image URL choice

    5. Done!
    Read More

    How to add Zoom Hover Effect to Image in blogger

    2 Comments
    Hi friends! Maybe you've heard about How to Add Drop Shadows Effect to Images. Now, we will make new effect. That's Add Zoom Hover Effect to Image. Shortly, when you put your cursor on an image, the image will be zoom (larger). Do you want to try the demo? OK, this is it. And if you want to know how to make the effect, just follow the steps below.
    1. Log in to your blogger account

    2. Go to Design --> Edit HTML

    3. Copy the code below, and paste above ]]></b:skin>

    .hovergallery img{
    -webkit-transform:scale(0.8);
    -moz-transform:scale(0.8);
    -o-transform:scale(0.8);
    -webkit-transition-duration: 0.5s;
    -moz-transition-duration: 0.5s;
    -o-transition-duration: 0.5s;
    opacity: 0.7;
    margin: 0 10px 5px 0;
    }

    .hovergallery img:hover{
    -webkit-transform:scale(1.1);
    -moz-transform:scale(1.1);
    -o-transform:scale(1.1);
    opacity: 1;
    }
    4. Then if you want to active the effect, use this code
    <a class="hovergallery" href="http://truebloggertrick.blogspot.com/" target="_blank">
    <img src="http://1.bp.blogspot.com/-ycrEcnVzJAs/TcXGWwcjL3I/AAAAAAAAAYQ/MiQNmK44ZOg/s200/fullblogtricks-blogger-icon.jpg" /></a>
    => Replace the blue code with your link
    => Replace the red code with image URL

    5. Finish... Hopefully useful..
    Read More

    How To Add Tooltip To Text in Blogger

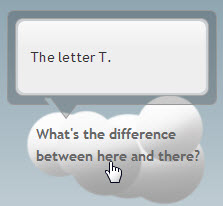
    Jquery tooltip plugin is great tool to explain a lot from a single word.You can easily implement this in your blog also it is very easy to use.You can highlight some words and add a tooltip to them,when any user hovers on the word a smooth tooltip will appear just above of the highlighted word with your description.This jQuery tooltip is designed by nettuts+ and I have reshared it on Helper Blogger.Now lets see how to add it and use it,

    How To Add jQuery Tooltip To Blogger?

    As I mentioned above the installation and usage of the tooltip is very easy,you just have to put some code in your template,just follow below simple steps.

    1. Adding Tooltip Scripts

    1. Go to Blogger Dashboard > Template
    2. Download a copy of your template
    3. Click on Edit HTML
    4. Hit Proceed button
    5. Find for below code in your template

    </head>

    add below code just above it,

    <script type="text/javascript" src="http://ajax.googleapis.com/ajax/libs/jquery/1.7.1/jquery.min.js"></script> <script type="text/javascript" src="http://yourjavascript.com/21412118492/truebloggertricks.blogspot.com-tooltip.js"></script>

    Note - If you have already added a jQuery plugin to your blog then don't add the first line from above code.

    2. Adding Tooltip Styles


    Find below code in your template,

    ]]></b:skin>

    add below code just above it,

    .tip { width: 212px; padding-top: 37px; overflow: hidden; display: none; position: absolute; z-index: 500; background: transparent url(https://blogger.googleusercontent.com/img/b/R29vZ2xl/AVvXsEhJG3VhaZF-hHLSZ6-vcwrNIytyBf7TattBKd_kAMhboKZL_xSDA1wqky1MXkZXOFMTS2JSGGOP0-tMrHlNev3p4qtwHM9zrFQN5l_8DMmi_aHmEMgJnyyiZ5EjY_N0O95qgahqxiu1t_s/s1600/hb_tipTop.png) no-repeat top; } .tipMid { background: transparent url(https://blogger.googleusercontent.com/img/b/R29vZ2xl/AVvXsEhlbiI4ewnkd1Lva_5KygEug88HEzQXKncQM3fkl6g-NEgynpGyaO08K8lbnX2T_Sh8zhFlbyL1P2obXqcCSMR_HpI8zOAf8gPfEksk42SEd9Vje4YS_JiCulsNhKRy27RytJJ38hqSRR0/s1600/hb_tipMid.png) repeat-y; padding: 0 25px 20px 25px; } .tipBtm { background: transparent url(https://blogger.googleusercontent.com/img/b/R29vZ2xl/AVvXsEg5C24jmlbsTc7wBudi_AQqeyG8rVag377adNxKwcVRdHeY9SJP5_D_fePvRKOGkXTA9n91CCG5Hg4NX84e__I-O1EJ3s3OHDgU7rfMq01LbNcWZU-BXV6Dt5vjVmxwkYCEyNQpm6cbusM/s1600/hb_tipBtm.png) no-repeat bottom; height: 32px; }

    3. Using The Tooltip


    If you want to add tooltip in blogger posts,then go to Edit HTML tab and add below code inside it.

    <div class="tTip" title="Add Tooltip Message Here">Add Your Text Here</div>

    • Replace Add Tooltip Message Here with the message which you want to appear in tooltip.
    • Replace Add Your Text Here with the text on which you want to appear tooltip.

    Hope you have liked it :)
    Read More

    How to Remove "H" Watermark Logo from Hello Bar

    3 Comments


    Hello Bar as we already posted about that in earlier post is the best notification bar used for urgent notices you wanted to share with your readers, give them some amazing latest news and other stuff but one problem with Hello Bar is that if you go for the free version than you will that H Logo on the left hand side being loaded every time when your reader visits your blog. 

    So that limitation can be removed if you go for the premium version but of you wanted to get it removed in this free version than we found an amazing trick to do that and it works simply awesome. So now results we will get below is the demo image I just tried on my website and it worked.
    hello-bar
    So now you can see that H is removed and it looks as you are a premium member for Hello Bar, so now if you want your H Logo to be removed than check below tutorial.
    • We are assuming that you are already using Hello-Bar in your website, if not than you can create an acc and generate code at hellobar.com.
    • Now to remove that little H logo from Hello Bar we just need to add a simple CSS code manipulating entire hello bar code.
    • So login to Blogger > Template > Edit HTML and press Ctrl + F and make a search for </head> tag and paste the below code right above it.
      <style type='text/css'>
      a#hellobar-logo, a#hellobar-logo:link, a#hellobar-logo:visited {
      display:none}</style>
    • Now just click on Save Template and than refresh your blog and see the effect.
    • Hope this works for you, if you liked this tutorial than make sure to share this post with all your friends by liking it below :)
    Read More

    How to list recent post titles by label

    4 Comments

    Do you want to list all or your most recent posts according to categories/labels? Well then, you’ve come to the right tutorial.
    I’ve seen people use a LinkList gadget to accomplish this. However this method requires them to MANUALLY add each post link to the gadget every time they publish a post with the specified label. Not good.
    list post by label 1
    We’re not going to do that, because we have a better, more elegant solution. Once added, the list will update itself automatically. The widget takes your blog’s label-specific feed, in JSON format and turn it into a list using Javascript. It other words it does the listing for you.
    No more slow and tedious manual updating and rearranging. Sounds good? Here we go:

    1. Installing the first list

    1. Go to Layout Design>>Page Elements.
    2. Click Add A Gadget.
    3. In Add A Gadget window, select HTML/Javascript .
    4. Enter a label as the title of your widget.
    5. Copy the code below and paste it inside the content box.
    6. Click Save.
    <!-- Recent Posts by Label Start --> <!-- code by http://truebloggertricks.blogspot.com/ --> <script type="text/javascript"> function recentpostslist(json) { document.write('<ul>'); for (var i = 0; i < json.feed.entry.length; i++) { for (var j = 0; j < json.feed.entry[i].link.length; j++) { if (json.feed.entry[i].link[j].rel == 'alternate') { break; } } var entryUrl = "'" + json.feed.entry[i].link[j].href + "'";//bs var entryTitle = json.feed.entry[i].title.$t; var item = "<li>" + "<a href="+ entryUrl + '" target="_blank">' + entryTitle + "</a> </li>"; document.write(item); } document.write('</ul>'); } </script> <script src="YOUR_BLOG_URL/feeds/posts/summary/-/YOUR_LABEL?max-results=SHOW_HOW_MANY&alt=json-in-script&callback=recentpostslist"></script> <span style="font-size: 80%; float:right;">Get this? <a href="http://truebloggertricks.blogspot.com/2012/09/how-to-list-recent-post-titles-by-label.html">widget</a></span> <!-- Recent Posts by Label End -->
    • Replace YOUR_BLOG_URL in code line 21 with your own blog URL. For example if you were to list posts from truebloggertricks.blogspot.com/, you would have to replace it with http://truebloggertricks.blogspot.com/ (without the trailing slash).
    • Replace YOUR_LABEL (line 21) with the label. Labels are case sensitive, make sure you get it right.
    • Replace the value of SHOW_HOW_MANY (line 21) with the number of posts you want to display. To show all posts, use 500 (I believe 500 is the maximum. If you have more than 500 posts under a certain label, do leave a comment, we’ll work something out).
    • The titles are bulleted due the use of ordered list <ul>. If you want them numbered instead, just replace ul (in line 5 and 18) with ol.

    2. Adding subsequent lists

    You need to add a HTML/Javascript gadget for each label. Repeat the same steps above for each label, with a slight difference:
    • You don’t have to copy the whole code. Just copy the codes in lines 21 and 22 into each gadget.
    • Make sure your first list (which contains the full code) is positioned on top of all other lists.
    Enjoy!
    Read More

    Animated CSS3 Bubble Buttons

    These bubble buttons are made with pure CSS3 and on mouse hover the bubble star shaking and this effect makes these button more beautiful.This button is available in four color themes and three sizes so that you can add any button of any size just by just changing the class name of button.


    How To Add Animated CSS3 Bubble Buttons To Blogger

    1. CSS Part
    2. HTML Part

    1. CSS Part

    1. Go to Blogger Dashboard > Template
    2. As always take a backup of your template
    3. Search for below code in your template
    ]]></b:skin>

    Add below code just above it

    .button {
        font: 15px Calibri, Arial, sans-serif;
    /* A semi-transparent text shadow */
        text-shadow: 1px 1px 0 rgba(255,255,255,0.4);
    /* Overriding the default underline styling of the links */
        text-decoration: none !important;
        white-space: nowrap;
        display: inline-block;
        vertical-align: baseline;
        position: relative;
        cursor: pointer;
        padding: 10px 20px;
        background-repeat: no-repeat;
    /* The following two rules are fallbacks, in case
    the browser does not support multiple backgrounds. */
        background-position: bottom left;
        background-image: url('https://blogger.googleusercontent.com/img/b/R29vZ2xl/AVvXsEjj71bJmECeRmGxnVofFN29POc6gRa6olUEa2-GOOE1V0KL8HyVP0wvZB7b7etvPWLzwYfKArzgcxoO5nHz8byStqLLr_NH-bkJMi39sqt4pYNZu32QL7je8q4g1p8iTI5Rm_yZBWVpIYk/s1600/truebloggertricks.blogspot.com-button_bg.png');
    /* Multiple backgrounds version. The background images
    are defined individually in color classes */
        background-position: bottom left, top right, 0 0, 0 0;
        background-clip: border-box;
    /* Applying a default border raidus of 8px */
        -moz-border-radius: 8px;
        -webkit-border-radius: 8px;
        border-radius: 8px;
    /* A 1px highlight inside of the button */
        -moz-box-shadow: 0 0 1px #fff inset;
        -webkit-box-shadow: 0 0 1px #fff inset;
        box-shadow: 0 0 1px #fff inset;
    /* Animating the background positions with CSS3 */
    /* Currently works only in Safari/Chrome */
        -webkit-transition: background-position 1s;
        -moz-transition: background-position 1s;
        transition: background-position 1s;
    }

    .button:hover {
    /* The first rule is a fallback, in case the browser
    does not support multiple backgrounds
    */
        background-position: top left;
        background-position: top left, bottom right, 0 0, 0 0;
    }

    .button:active {
    /* Moving the button 1px to the bottom when clicked */
        bottom: -1px;
    }
    /* The three buttons sizes */
    .button.big {
        font-size: 30px;
    }

    .button.medium {
        font-size: 18px;
    }

    .button.small {
        font-size: 13px;
    }
    /* A more rounded button */
    .button.rounded {
        -moz-border-radius: 4em;
        -webkit-border-radius: 4em;
        border-radius: 4em;
    }
    /* Defining four button colors */
    /* BlueButton */
    .blue.button {
        color: #0f4b6d !important;
        border: 1px solid #84acc3 !important;
    /* A fallback background color */
        background-color: #48b5f2;
    /* Specifying a version with gradients according to */
        background-image: url('https://blogger.googleusercontent.com/img/b/R29vZ2xl/AVvXsEjj71bJmECeRmGxnVofFN29POc6gRa6olUEa2-GOOE1V0KL8HyVP0wvZB7b7etvPWLzwYfKArzgcxoO5nHz8byStqLLr_NH-bkJMi39sqt4pYNZu32QL7je8q4g1p8iTI5Rm_yZBWVpIYk/s1600/truebloggertricks.blogspot.com-button_bg.png'), url('https://blogger.googleusercontent.com/img/b/R29vZ2xl/AVvXsEjj71bJmECeRmGxnVofFN29POc6gRa6olUEa2-GOOE1V0KL8HyVP0wvZB7b7etvPWLzwYfKArzgcxoO5nHz8byStqLLr_NH-bkJMi39sqt4pYNZu32QL7je8q4g1p8iTI5Rm_yZBWVpIYk/s1600/truebloggertricks.blogspot.com-button_bg.png'),
    -moz-radial-gradient(    center bottom, circle,
    rgba(89,208,244,1) 0,rgba(89,208,244,0) 100px),
    -moz-linear-gradient(#4fbbf7, #3faeeb);
        background-image: url('https://blogger.googleusercontent.com/img/b/R29vZ2xl/AVvXsEjj71bJmECeRmGxnVofFN29POc6gRa6olUEa2-GOOE1V0KL8HyVP0wvZB7b7etvPWLzwYfKArzgcxoO5nHz8byStqLLr_NH-bkJMi39sqt4pYNZu32QL7je8q4g1p8iTI5Rm_yZBWVpIYk/s1600/truebloggertricks.blogspot.com-button_bg.png'), url('https://blogger.googleusercontent.com/img/b/R29vZ2xl/AVvXsEjj71bJmECeRmGxnVofFN29POc6gRa6olUEa2-GOOE1V0KL8HyVP0wvZB7b7etvPWLzwYfKArzgcxoO5nHz8byStqLLr_NH-bkJMi39sqt4pYNZu32QL7je8q4g1p8iTI5Rm_yZBWVpIYk/s1600/truebloggertricks.blogspot.com-button_bg.png'),
    -webkit-gradient(    radial, 50% 100%, 0, 50% 100%, 100,
    from(rgba(89,208,244,1)), to(rgba(89,208,244,0))),
    -webkit-gradient(linear, 0% 0%, 0% 100%, from(#4fbbf7), to(#3faeeb));
    }

    .blue.button:hover {
        background-color: #63c7fe;
        background-image: url('https://blogger.googleusercontent.com/img/b/R29vZ2xl/AVvXsEjj71bJmECeRmGxnVofFN29POc6gRa6olUEa2-GOOE1V0KL8HyVP0wvZB7b7etvPWLzwYfKArzgcxoO5nHz8byStqLLr_NH-bkJMi39sqt4pYNZu32QL7je8q4g1p8iTI5Rm_yZBWVpIYk/s1600/truebloggertricks.blogspot.com-button_bg.png'), url('https://blogger.googleusercontent.com/img/b/R29vZ2xl/AVvXsEjj71bJmECeRmGxnVofFN29POc6gRa6olUEa2-GOOE1V0KL8HyVP0wvZB7b7etvPWLzwYfKArzgcxoO5nHz8byStqLLr_NH-bkJMi39sqt4pYNZu32QL7je8q4g1p8iTI5Rm_yZBWVpIYk/s1600/truebloggertricks.blogspot.com-button_bg.png'),
    -moz-radial-gradient(    center bottom, circle,
    rgba(109,217,250,1) 0,rgba(109,217,250,0) 100px),
    -moz-linear-gradient(#63c7fe, #58bef7);
        background-image: url('https://blogger.googleusercontent.com/img/b/R29vZ2xl/AVvXsEjj71bJmECeRmGxnVofFN29POc6gRa6olUEa2-GOOE1V0KL8HyVP0wvZB7b7etvPWLzwYfKArzgcxoO5nHz8byStqLLr_NH-bkJMi39sqt4pYNZu32QL7je8q4g1p8iTI5Rm_yZBWVpIYk/s1600/truebloggertricks.blogspot.com-button_bg.png'), url('https://blogger.googleusercontent.com/img/b/R29vZ2xl/AVvXsEjj71bJmECeRmGxnVofFN29POc6gRa6olUEa2-GOOE1V0KL8HyVP0wvZB7b7etvPWLzwYfKArzgcxoO5nHz8byStqLLr_NH-bkJMi39sqt4pYNZu32QL7je8q4g1p8iTI5Rm_yZBWVpIYk/s1600/truebloggertricks.blogspot.com-button_bg.png'),
    -webkit-gradient(    radial, 50% 100%, 0, 50% 100%, 100,
    from(rgba(109,217,250,1)), to(rgba(109,217,250,0))),
    -webkit-gradient(linear, 0% 0%, 0% 100%, from(#63c7fe), to(#58bef7));
    }
    /* Green Button */
    .green.button {
        color: #345903 !important;
        border: 1px solid #96a37b !important;
        background-color: #79be1e;
        background-image: url('https://blogger.googleusercontent.com/img/b/R29vZ2xl/AVvXsEjj71bJmECeRmGxnVofFN29POc6gRa6olUEa2-GOOE1V0KL8HyVP0wvZB7b7etvPWLzwYfKArzgcxoO5nHz8byStqLLr_NH-bkJMi39sqt4pYNZu32QL7je8q4g1p8iTI5Rm_yZBWVpIYk/s1600/truebloggertricks.blogspot.com-button_bg.png'), url('https://blogger.googleusercontent.com/img/b/R29vZ2xl/AVvXsEjj71bJmECeRmGxnVofFN29POc6gRa6olUEa2-GOOE1V0KL8HyVP0wvZB7b7etvPWLzwYfKArzgcxoO5nHz8byStqLLr_NH-bkJMi39sqt4pYNZu32QL7je8q4g1p8iTI5Rm_yZBWVpIYk/s1600/truebloggertricks.blogspot.com-button_bg.png'), -moz-radial-gradient(center bottom, circle, rgba(162,211,30,1) 0,rgba(162,211,30,0) 100px),-moz-linear-gradient(#82cc27, #74b317);
        background-image: url('https://blogger.googleusercontent.com/img/b/R29vZ2xl/AVvXsEjj71bJmECeRmGxnVofFN29POc6gRa6olUEa2-GOOE1V0KL8HyVP0wvZB7b7etvPWLzwYfKArzgcxoO5nHz8byStqLLr_NH-bkJMi39sqt4pYNZu32QL7je8q4g1p8iTI5Rm_yZBWVpIYk/s1600/truebloggertricks.blogspot.com-button_bg.png'), url('https://blogger.googleusercontent.com/img/b/R29vZ2xl/AVvXsEjj71bJmECeRmGxnVofFN29POc6gRa6olUEa2-GOOE1V0KL8HyVP0wvZB7b7etvPWLzwYfKArzgcxoO5nHz8byStqLLr_NH-bkJMi39sqt4pYNZu32QL7je8q4g1p8iTI5Rm_yZBWVpIYk/s1600/truebloggertricks.blogspot.com-button_bg.png'), -webkit-gradient(radial, 50% 100%, 0, 50% 100%, 100, from(rgba(162,211,30,1)), to(rgba(162,211,30,0))),-webkit-gradient(linear, 0% 0%, 0% 100%, from(#82cc27), to(#74b317));
    }

    .green.button:hover {
        background-color: #89d228;
        background-image: url('https://blogger.googleusercontent.com/img/b/R29vZ2xl/AVvXsEjj71bJmECeRmGxnVofFN29POc6gRa6olUEa2-GOOE1V0KL8HyVP0wvZB7b7etvPWLzwYfKArzgcxoO5nHz8byStqLLr_NH-bkJMi39sqt4pYNZu32QL7je8q4g1p8iTI5Rm_yZBWVpIYk/s1600/truebloggertricks.blogspot.com-button_bg.png'), url('https://blogger.googleusercontent.com/img/b/R29vZ2xl/AVvXsEjj71bJmECeRmGxnVofFN29POc6gRa6olUEa2-GOOE1V0KL8HyVP0wvZB7b7etvPWLzwYfKArzgcxoO5nHz8byStqLLr_NH-bkJMi39sqt4pYNZu32QL7je8q4g1p8iTI5Rm_yZBWVpIYk/s1600/truebloggertricks.blogspot.com-button_bg.png'), -moz-radial-gradient(center bottom, circle, rgba(183,229,45,1) 0,rgba(183,229,45,0) 100px),-moz-linear-gradient(#90de31, #7fc01e);
        background-image: url('https://blogger.googleusercontent.com/img/b/R29vZ2xl/AVvXsEjj71bJmECeRmGxnVofFN29POc6gRa6olUEa2-GOOE1V0KL8HyVP0wvZB7b7etvPWLzwYfKArzgcxoO5nHz8byStqLLr_NH-bkJMi39sqt4pYNZu32QL7je8q4g1p8iTI5Rm_yZBWVpIYk/s1600/truebloggertricks.blogspot.com-button_bg.png'), url('https://blogger.googleusercontent.com/img/b/R29vZ2xl/AVvXsEjj71bJmECeRmGxnVofFN29POc6gRa6olUEa2-GOOE1V0KL8HyVP0wvZB7b7etvPWLzwYfKArzgcxoO5nHz8byStqLLr_NH-bkJMi39sqt4pYNZu32QL7je8q4g1p8iTI5Rm_yZBWVpIYk/s1600/truebloggertricks.blogspot.com-button_bg.png'), -webkit-gradient(radial, 50% 100%, 0, 50% 100%, 100, from(rgba(183,229,45,1)), to(rgba(183,229,45,0))),-webkit-gradient(linear, 0% 0%, 0% 100%, from(#90de31), to(#7fc01e));
    }
    /* Orange Button */
    .orange.button {
        color: #693e0a !important;
        border: 1px solid #bea280 !important;
        background-color: #e38d27;
        background-image: url('https://blogger.googleusercontent.com/img/b/R29vZ2xl/AVvXsEjj71bJmECeRmGxnVofFN29POc6gRa6olUEa2-GOOE1V0KL8HyVP0wvZB7b7etvPWLzwYfKArzgcxoO5nHz8byStqLLr_NH-bkJMi39sqt4pYNZu32QL7je8q4g1p8iTI5Rm_yZBWVpIYk/s1600/truebloggertricks.blogspot.com-button_bg.png'), url('https://blogger.googleusercontent.com/img/b/R29vZ2xl/AVvXsEjj71bJmECeRmGxnVofFN29POc6gRa6olUEa2-GOOE1V0KL8HyVP0wvZB7b7etvPWLzwYfKArzgcxoO5nHz8byStqLLr_NH-bkJMi39sqt4pYNZu32QL7je8q4g1p8iTI5Rm_yZBWVpIYk/s1600/truebloggertricks.blogspot.com-button_bg.png'), -moz-radial-gradient(center bottom, circle, rgba(232,189,45,1) 0,rgba(232,189,45,0) 100px),-moz-linear-gradient(#f1982f, #d4821f);
        background-image: url('https://blogger.googleusercontent.com/img/b/R29vZ2xl/AVvXsEjj71bJmECeRmGxnVofFN29POc6gRa6olUEa2-GOOE1V0KL8HyVP0wvZB7b7etvPWLzwYfKArzgcxoO5nHz8byStqLLr_NH-bkJMi39sqt4pYNZu32QL7je8q4g1p8iTI5Rm_yZBWVpIYk/s1600/truebloggertricks.blogspot.com-button_bg.png'), url('https://blogger.googleusercontent.com/img/b/R29vZ2xl/AVvXsEjj71bJmECeRmGxnVofFN29POc6gRa6olUEa2-GOOE1V0KL8HyVP0wvZB7b7etvPWLzwYfKArzgcxoO5nHz8byStqLLr_NH-bkJMi39sqt4pYNZu32QL7je8q4g1p8iTI5Rm_yZBWVpIYk/s1600/truebloggertricks.blogspot.com-button_bg.png'), -webkit-gradient(radial, 50% 100%, 0, 50% 100%, 100, from(rgba(232,189,45,1)), to(rgba(232,189,45,0))),-webkit-gradient(linear, 0% 0%, 0% 100%, from(#f1982f), to(#d4821f));
    }

    .orange.button:hover {
        background-color: #ec9732;
        background-image: url('https://blogger.googleusercontent.com/img/b/R29vZ2xl/AVvXsEjj71bJmECeRmGxnVofFN29POc6gRa6olUEa2-GOOE1V0KL8HyVP0wvZB7b7etvPWLzwYfKArzgcxoO5nHz8byStqLLr_NH-bkJMi39sqt4pYNZu32QL7je8q4g1p8iTI5Rm_yZBWVpIYk/s1600/truebloggertricks.blogspot.com-button_bg.png'), url('https://blogger.googleusercontent.com/img/b/R29vZ2xl/AVvXsEjj71bJmECeRmGxnVofFN29POc6gRa6olUEa2-GOOE1V0KL8HyVP0wvZB7b7etvPWLzwYfKArzgcxoO5nHz8byStqLLr_NH-bkJMi39sqt4pYNZu32QL7je8q4g1p8iTI5Rm_yZBWVpIYk/s1600/truebloggertricks.blogspot.com-button_bg.png'), -moz-radial-gradient(center bottom, circle, rgba(241,192,52,1) 0,rgba(241,192,52,0) 100px),-moz-linear-gradient(#f9a746, #e18f2b);
        background-image: url('https://blogger.googleusercontent.com/img/b/R29vZ2xl/AVvXsEjj71bJmECeRmGxnVofFN29POc6gRa6olUEa2-GOOE1V0KL8HyVP0wvZB7b7etvPWLzwYfKArzgcxoO5nHz8byStqLLr_NH-bkJMi39sqt4pYNZu32QL7je8q4g1p8iTI5Rm_yZBWVpIYk/s1600/truebloggertricks.blogspot.com-button_bg.png'), url('https://blogger.googleusercontent.com/img/b/R29vZ2xl/AVvXsEjj71bJmECeRmGxnVofFN29POc6gRa6olUEa2-GOOE1V0KL8HyVP0wvZB7b7etvPWLzwYfKArzgcxoO5nHz8byStqLLr_NH-bkJMi39sqt4pYNZu32QL7je8q4g1p8iTI5Rm_yZBWVpIYk/s1600/truebloggertricks.blogspot.com-button_bg.png'), -webkit-gradient(radial, 50% 100%, 0, 50% 100%, 100, from(rgba(241,192,52,1)), to(rgba(241,192,52,0))),-webkit-gradient(linear, 0% 0%, 0% 100%, from(#f9a746), to(#e18f2b));
    }

    .gray.button {
        color: #525252 !important;
        border: 1px solid #a5a5a5 !important;
        background-color: #a9adb1;
        background-image: url('https://blogger.googleusercontent.com/img/b/R29vZ2xl/AVvXsEjj71bJmECeRmGxnVofFN29POc6gRa6olUEa2-GOOE1V0KL8HyVP0wvZB7b7etvPWLzwYfKArzgcxoO5nHz8byStqLLr_NH-bkJMi39sqt4pYNZu32QL7je8q4g1p8iTI5Rm_yZBWVpIYk/s1600/truebloggertricks.blogspot.com-button_bg.png'), url('https://blogger.googleusercontent.com/img/b/R29vZ2xl/AVvXsEjj71bJmECeRmGxnVofFN29POc6gRa6olUEa2-GOOE1V0KL8HyVP0wvZB7b7etvPWLzwYfKArzgcxoO5nHz8byStqLLr_NH-bkJMi39sqt4pYNZu32QL7je8q4g1p8iTI5Rm_yZBWVpIYk/s1600/truebloggertricks.blogspot.com-button_bg.png'), -moz-radial-gradient(center bottom, circle, rgba(197,199,202,1) 0,rgba(197,199,202,0) 100px),-moz-linear-gradient(#c5c7ca, #92989c);
        background-image: url('https://blogger.googleusercontent.com/img/b/R29vZ2xl/AVvXsEjj71bJmECeRmGxnVofFN29POc6gRa6olUEa2-GOOE1V0KL8HyVP0wvZB7b7etvPWLzwYfKArzgcxoO5nHz8byStqLLr_NH-bkJMi39sqt4pYNZu32QL7je8q4g1p8iTI5Rm_yZBWVpIYk/s1600/truebloggertricks.blogspot.com-button_bg.png'), url('https://blogger.googleusercontent.com/img/b/R29vZ2xl/AVvXsEjj71bJmECeRmGxnVofFN29POc6gRa6olUEa2-GOOE1V0KL8HyVP0wvZB7b7etvPWLzwYfKArzgcxoO5nHz8byStqLLr_NH-bkJMi39sqt4pYNZu32QL7je8q4g1p8iTI5Rm_yZBWVpIYk/s1600/truebloggertricks.blogspot.com-button_bg.png'), -webkit-gradient(radial, 50% 100%, 0, 50% 100%, 100, from(rgba(197,199,202,1)), to(rgba(197,199,202,0))),-webkit-gradient(linear, 0% 0%, 0% 100%, from(#c5c7ca), to(#92989c));
    }

    .gray.button:hover {
        background-color: #b6bbc0;
        background-image: url('https://blogger.googleusercontent.com/img/b/R29vZ2xl/AVvXsEjj71bJmECeRmGxnVofFN29POc6gRa6olUEa2-GOOE1V0KL8HyVP0wvZB7b7etvPWLzwYfKArzgcxoO5nHz8byStqLLr_NH-bkJMi39sqt4pYNZu32QL7je8q4g1p8iTI5Rm_yZBWVpIYk/s1600/truebloggertricks.blogspot.com-button_bg.png'), url('https://blogger.googleusercontent.com/img/b/R29vZ2xl/AVvXsEjj71bJmECeRmGxnVofFN29POc6gRa6olUEa2-GOOE1V0KL8HyVP0wvZB7b7etvPWLzwYfKArzgcxoO5nHz8byStqLLr_NH-bkJMi39sqt4pYNZu32QL7je8q4g1p8iTI5Rm_yZBWVpIYk/s1600/truebloggertricks.blogspot.com-button_bg.png'), -moz-radial-gradient(center bottom, circle, rgba(202,205,208,1) 0,rgba(202,205,208,0) 100px),-moz-linear-gradient(#d1d3d6, #9fa5a9);
        background-image: url('https://blogger.googleusercontent.com/img/b/R29vZ2xl/AVvXsEjj71bJmECeRmGxnVofFN29POc6gRa6olUEa2-GOOE1V0KL8HyVP0wvZB7b7etvPWLzwYfKArzgcxoO5nHz8byStqLLr_NH-bkJMi39sqt4pYNZu32QL7je8q4g1p8iTI5Rm_yZBWVpIYk/s1600/truebloggertricks.blogspot.com-button_bg.png'), url('https://blogger.googleusercontent.com/img/b/R29vZ2xl/AVvXsEjj71bJmECeRmGxnVofFN29POc6gRa6olUEa2-GOOE1V0KL8HyVP0wvZB7b7etvPWLzwYfKArzgcxoO5nHz8byStqLLr_NH-bkJMi39sqt4pYNZu32QL7je8q4g1p8iTI5Rm_yZBWVpIYk/s1600/truebloggertricks.blogspot.com-button_bg.png'), -webkit-gradient(radial, 50% 100%, 0, 50% 100%, 100, from(rgba(202,205,208,1)), to(rgba(202,205,208,0))),-webkit-gradient(linear, 0% 0%, 0% 100%, from(#d1d3d6), to(#9fa5a9));
    }


    Now we have integrated the CSS part in the template let's see how to use them.

    2. HTML Part

    Here I am listing button's HTML part according to their sizes.First choose size of button then choose color of button.

    1.HTML For Big Button (Choose anyone according to button color)

    <a href="LINK HERE" class="button big blue">TEXT HERE</a> 
    
    <a href="LINK HERE" class="button big green">TEXT HERE</a> 
    
    <a href="LINK HERE" class="button big orange">TEXT HERE</a> 
    
    <a href="LINK HERE" class="button big gray">TEXT HERE</a>


    2.HTML For Medium Button (Choose anyone according to button color)

    <a href="LINK HERE" class="button blue medium">TEXT HERE</a> 
    
    <a href="LINK HERE" class="button green medium">TEXT HERE</a> 
    
    <a href="LINK HERE" class="button orange medium">TEXT HERE</a> 
    
    <a href="LINK HERE" class="button gray medium">TEXT HERE</a>


    3.HTML For Small Button (Choose anyone according to button color)

    <a href="LINK HERE" class="button small blue">TEXT HERE</a> 
    
    <a href="LINK HERE" class="button small green">TEXT HERE</a> 
    
    <a href="LINK HERE" class="button small orange">TEXT HERE</a> 
    
    <a href="LINK HERE" class="button small gray">TEXT HERE</a>


    4.HTML For Small Rounded Buttons (Choose anyone according to button color)

    <a href="LINK HERE" class="button small blue rounded">TEXT HERE</a> 
    
    <a href="LINK HERE" class="button small green rounded">TEXT HERE</a> 
    
    <a href="LINK HERE" class="button small orange rounded">TEXT HERE</a> 
    
    <a href="LINK HERE" class="button small gray rounded">TEXT HERE</a>


    Now replace "LINK HERE" with the link which you want to add it to button and replace "TEXT HERE" with the text which you want to appear on your button.
    Read More