Showing posts with label blockquote. Show all posts

Disable copy paste except specified codes using css

28 Comments
Disable copy paste except codes using css
Most of the Genuine Bloggers faces the problem of plagiarism. Generally the New bloggers do not understand the value of quality content. You are spending a lot of time to write your blog posts but a content thieve visits to your blog and copies all your work. Some times those content thieves results can be first in Google Search then you , So its a head cache for you .You can use disable copy script in your blog.But If your blog deals with some tutorial codes or text to be copied,you cant use that script.So today, I am going to reveal a trick to disable copying except your specified codes to be copied using simple css tricks.Live Demo can be seen in this blog.


Advantages of this CSS:

  • No javascript .So, It does not affect your blogs load time.
  • It works on all major browsers.
  • You can use this css in all type of blog niche.

 How to add this CSS to your blog ?

  • Login to Blogger > Dashboard
  • Click on Drop Down Menu and select Template
  • Backup your Template before making any changes to your blog
  • Now Click on Edit HTML > Proceed
  • Press Ctrl + F and search the code shown below. 
]]></b:skin>
  • Paste below codes above it.
.post-body {-webkit-touch-callout: none; -khtml-user-select: none; -moz-user-select: -moz-none; -ms-user-select: none; user-select: none; text-align: justify;} blockquote {-webkit-touch-callout: text; -khtml-user-select: text; -moz-user-select: text; -ms-user-select: text; user-select: text;}

Editing CSS

Replace blockquote with your html tag to which you use to display the codes.Example:I am using blockquote tag to highlight the codes (i.e)

                 <blockquote>          

                  code goes here....

                 </blockquote>

So, I used blockquote tag in above css.If your using something <codeview> your text </codeview> ,You need to replace blockquote with codeview.Now your css codes will look like,

.post-body {-webkit-touch-callout: none; -khtml-user-select: none; -moz-user-select: -moz-none; -ms-user-select: none; user-select: none; text-align: justify;} codeview {-webkit-touch-callout: text; -khtml-user-select: text; -moz-user-select: text; -ms-user-select: text; user-select: text;} 

  • Now save the template .
Congratulation, now your blogger site is completely plagiarism protected.Remember this code is secure and it does not harm your SEO.Please share this post with your friends.If you have any doubts regarding this topic,Just comment below.I will answer as soon as time allows.
Read More

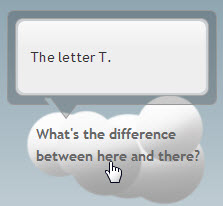
How To Add Tooltip To Text in Blogger

Jquery tooltip plugin is great tool to explain a lot from a single word.You can easily implement this in your blog also it is very easy to use.You can highlight some words and add a tooltip to them,when any user hovers on the word a smooth tooltip will appear just above of the highlighted word with your description.This jQuery tooltip is designed by nettuts+ and I have reshared it on Helper Blogger.Now lets see how to add it and use it,

How To Add jQuery Tooltip To Blogger?

As I mentioned above the installation and usage of the tooltip is very easy,you just have to put some code in your template,just follow below simple steps.

1. Adding Tooltip Scripts

  1. Go to Blogger Dashboard > Template
  2. Download a copy of your template
  3. Click on Edit HTML
  4. Hit Proceed button
  5. Find for below code in your template

</head>

add below code just above it,

<script type="text/javascript" src="http://ajax.googleapis.com/ajax/libs/jquery/1.7.1/jquery.min.js"></script> <script type="text/javascript" src="http://yourjavascript.com/21412118492/truebloggertricks.blogspot.com-tooltip.js"></script>

Note - If you have already added a jQuery plugin to your blog then don't add the first line from above code.

2. Adding Tooltip Styles


Find below code in your template,

]]></b:skin>

add below code just above it,

.tip { width: 212px; padding-top: 37px; overflow: hidden; display: none; position: absolute; z-index: 500; background: transparent url(https://blogger.googleusercontent.com/img/b/R29vZ2xl/AVvXsEhJG3VhaZF-hHLSZ6-vcwrNIytyBf7TattBKd_kAMhboKZL_xSDA1wqky1MXkZXOFMTS2JSGGOP0-tMrHlNev3p4qtwHM9zrFQN5l_8DMmi_aHmEMgJnyyiZ5EjY_N0O95qgahqxiu1t_s/s1600/hb_tipTop.png) no-repeat top; } .tipMid { background: transparent url(https://blogger.googleusercontent.com/img/b/R29vZ2xl/AVvXsEhlbiI4ewnkd1Lva_5KygEug88HEzQXKncQM3fkl6g-NEgynpGyaO08K8lbnX2T_Sh8zhFlbyL1P2obXqcCSMR_HpI8zOAf8gPfEksk42SEd9Vje4YS_JiCulsNhKRy27RytJJ38hqSRR0/s1600/hb_tipMid.png) repeat-y; padding: 0 25px 20px 25px; } .tipBtm { background: transparent url(https://blogger.googleusercontent.com/img/b/R29vZ2xl/AVvXsEg5C24jmlbsTc7wBudi_AQqeyG8rVag377adNxKwcVRdHeY9SJP5_D_fePvRKOGkXTA9n91CCG5Hg4NX84e__I-O1EJ3s3OHDgU7rfMq01LbNcWZU-BXV6Dt5vjVmxwkYCEyNQpm6cbusM/s1600/hb_tipBtm.png) no-repeat bottom; height: 32px; }

3. Using The Tooltip


If you want to add tooltip in blogger posts,then go to Edit HTML tab and add below code inside it.

<div class="tTip" title="Add Tooltip Message Here">Add Your Text Here</div>

  • Replace Add Tooltip Message Here with the message which you want to appear in tooltip.
  • Replace Add Your Text Here with the text on which you want to appear tooltip.

Hope you have liked it :)
Read More

Customise your blockquote with syntax highlighter

3 Comments
Most bloggers use the standard blockquote to share tutorials based on scripts and codes with their visitors but Alex Gorbatchev has created an amazing fully functional Highlighter that neatly displays web technologies such as HTML, CSS, JavaScript, Php, Python, Sql, xml etc. The codes are displayed line by line number wise. It also provides the user with options to Print the code, copy it to clip board or to see the code Source.
Alex has released the latest version (3.0.83) but we will use the old version (2.1.383) as it contains the options I mentioned above. Each code type comes with a script called Brush. I have used the most popular brushes as I mentioned earlier but if you wish to use a brush of your choice then you can select one from this Brush list.


How To Add Syntax Highlighter In Blogger?

The steps are more simple than you can imagine. I have tried to make the installation as easy as possible. Follow these steps,
  1. Go To Blogger > Design > Edit HTML
  2. Backup your template
  3. Search for this,
]]></b:skin>
     4.  And just below it paste the following code,
<!--SYNTAX HIGHLIGHTER STARTS-->
<link href='http://alexgorbatchev.com/pub/sh/2.1.382/styles/shCore.css' rel='stylesheet' type='text/css'/>
<link href='http://alexgorbatchev.com/pub/sh/2.1.382/styles/shThemeDefault.css' rel='stylesheet' type='text/css'/>
<script src='http://alexgorbatchev.com/pub/sh/2.1.382/scripts/shCore.js' type='text/javascript'/>
<script src='http://alexgorbatchev.com/pub/sh/2.1.382/scripts/shBrushCpp.js' type='text/javascript'/>
<script src='http://alexgorbatchev.com/pub/sh/2.1.382/scripts/shBrushCSharp.js' type='text/javascript'/>
<script src='http://alexgorbatchev.com/pub/sh/2.1.382/scripts/shBrushCss.js' type='text/javascript'/>
<script src='http://alexgorbatchev.com/pub/sh/current/scripts/shYouBrushJava.js' type='text/javascript'/>
<script src='http://alexgorbatchev.com/pub/sh/2.1.382/scripts/shBrushJScript.js' type='text/javascript'/>
<script src='http://alexgorbatchev.com/pub/sh/2.1.382/scripts/shBrushPhp.js' type='text/javascript'/>
<script src='http://alexgorbatchev.com/pub/sh/2.1.382/scripts/shBrushPython.js' type='text/javascript'/>
<script src='http://alexgorbatchev.com/pub/sh/2.1.382/scripts/shBrushRuby.js' type='text/javascript'/>
<script src='http://alexgorbatchev.com/pub/sh/2.1.382/scripts/shBrushSql.js' type='text/javascript'/>
<script src='http://alexgorbatchev.com/pub/sh/2.1.382/scripts/shBrushVb.js' type='text/javascript'/>
<script src='http://alexgorbatchev.com/pub/sh/2.1.382/scripts/shBrushXml.js' type='text/javascript'/>
<script src='http://alexgorbatchev.com/pub/sh/2.1.382/scripts/shBrushPerl.js' type='text/javascript'/>
<script language='javascript'>
SyntaxHighlighter.config.bloggerMode = true;
SyntaxHighlighter.config.clipboardSwf = &#39;http://alexgorbatchev.com/pub/sh/2.1.382/scripts/clipboard.swf&#39;;
SyntaxHighlighter.all();
</script>
<!--SYNTAX HIGHLIGHTER ENDS-->

     5.   Save your template and you are done!

How it works?

Whenever you wish to share a code of any type with your readers, simply enclose the code between these lines,
<pre class="brush:css, brush:html, brush:js, brush:php, brush:sql, brush:python">
ADD THE PARSED CODE HERE
</pre>
I have combined all brushes into one making it easier for newbie to implement the tutorial.
Note: Do not add the code directly because you will get error in Blogger Editor, instead first parse the code using the Parser Tool provided by us.
Replace ADD THE PARSED CODE HERE with the parsed/encoded code and publish your post to the see the magic.
That's it! Hope you like it. I will publish different color schemes for Syntax Highlighter in my next posts so make sure you don't miss the update. I also published some block quotes with auto number list and if you wish you can use them instead by reading this tutorial,
Read More